Image: Shutterstock
As we already know, it is not easy to please a teen. Their choices have changed as to when they were kids, and they are often not verbal enough about what their likes and dislikes are. If you are planning to buy something for your teen, here are some fun Christmas gift ideas for teens. Christmas is a time when you go all-out to make your near and dear ones. So gifting goes a long way in strengthening your relationship with your friends and family. However, people often get confused about the kind of gift that would suit a teen. To help you with that, we have curated some gift ideas for your teen.
Check out the Christmas Gift Ideas For Teens here:
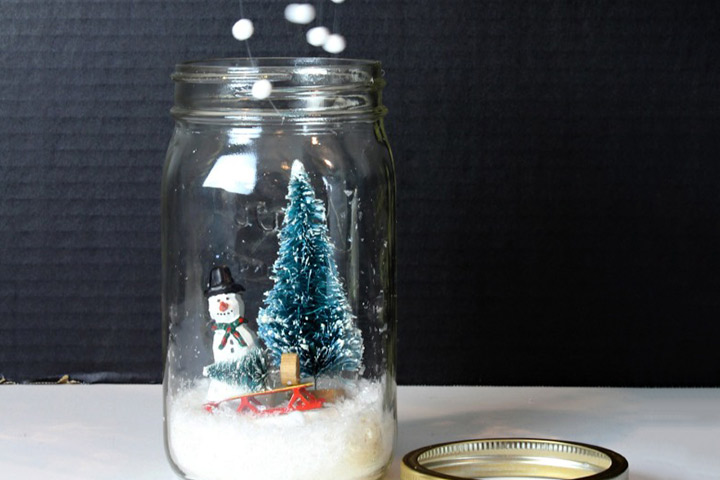
1. Mason Jar Snow Globe
Image: Source
You Will Need:
- A mason jar
- Fake Snow
- Small White Balls
- Figurines
- Golden spray paint
- Needle
- Fishing line
- Tape
How To:
- Spray the lid with gold spray paint. While the paint dries, thread a needle with fishing line and start stringing the balls onto the line.
- Stick the snowballs fishing line to the lid using a tape
- Dust some fake snow on the figurines and affix on a piece of wood.
- Add some fake snow to the jar and place the figurines in it.
- Attach the lid to the jar and the gift is ready.
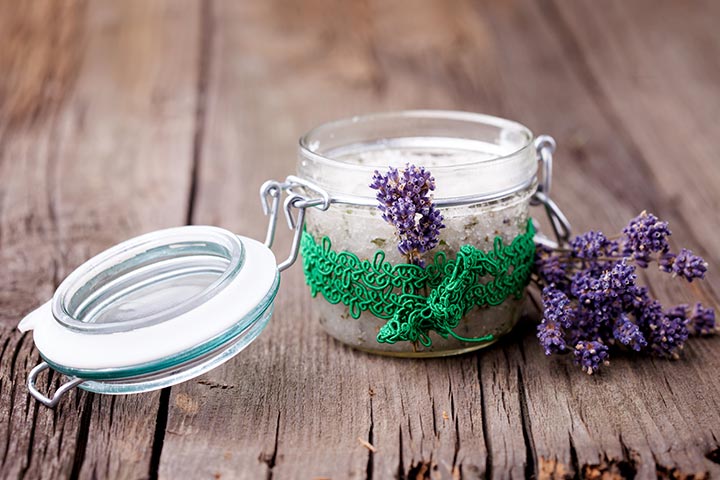
2. Coconut Salt Body And Foot Scrub
You Will Need:
- Organic coconut oil.
- Vitamin E oil
- Sugar
- Lavender essential oil.
How To:
- Mix sugar with coconut and vitamin E oil at 2:1 ratio. For example, if you are using 1-cup sugar, then mix with ¼-cup coconut oil and ¼-cup vitamin E oil.
- Add 3 to 4 drops of lavender oil and stir well.
- Put the body scrub into a jar and decorate with labels and ribbon. You can even send a handwritten note along with it. One of the best christmas gifts for teens.
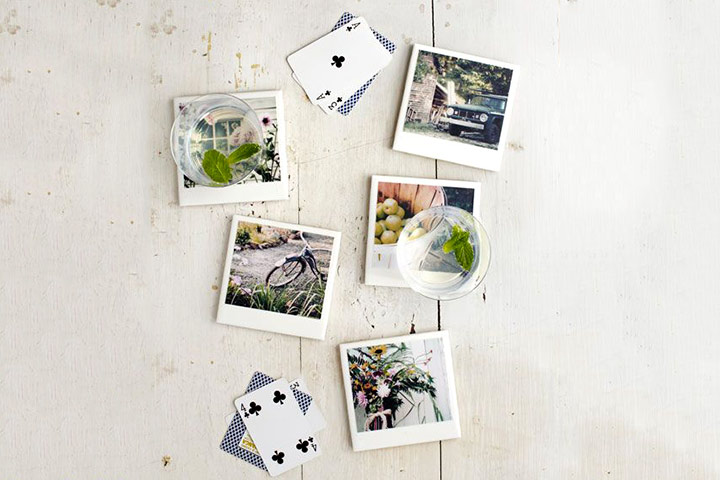
3. Ceramic Tile Coaster
Image: countryliving.com
You Will Need:
- Mod Podge
- 5*5-inch square tiles in white.
- Photos of your teenager
- Foam brush
- Scissors
How To:
- Trim the photos to 3 1/4 inches in height and 3 ¾ inches in width.
- Apply Mod Podge on the back of the picture and position on the tiles. Make sure you leave ¾ inches at the bottom and ¼ inch on the sides. Leave it aside to dry for 30 minutes.
- Spread the Mod Podge on the photo and the exposed side of the tile and leave it to dry for an hour. Repeat the same method two to three times.
- Finally, spray clear sealant and leave it to dry for 24 hours.
- Attach felt pads on the underside corners of the picture, and it is ready.
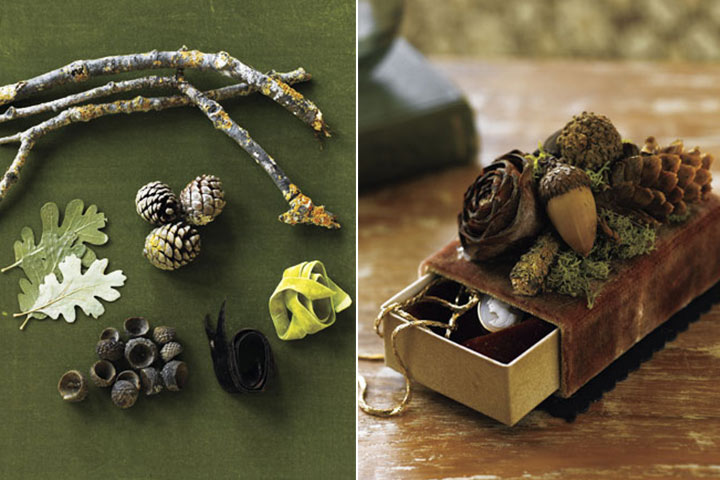
4. Wooden Jewelry Box
Image: countryliving.com
You Will Need:
- Twigs
- Acorns
- Pinecones
- Wool
- Brown felt
- Velvet ribbon
- Baling wire
- Pinking shear
- Slide box
How To:
- Measure the top and two sides of the box. Cut out the velvet fabric according to the measurement and wrap it around the box. If the measurement is perfect, stick the corner and edges of the velvet fabric to the box.
- Cut a piece of black cardboard 2 inches larger than the bottom of the box. Stick the cardboard to the bottom of the box and trim off the excess with scissors.
- Arrange the pine cones, dried cones and moss on top of the box and affix with hot glue.
- Now put jewelry or anything you want to gift to your teen.
This can be one of the surprising Christmas gifts for teen girls.
5. Tin Candles
Image: countryliving.com
You Will Need:
- Four, 6-inch-length wire-core wicks
- 4 tin cans
- 4 wick holders
- 1.5 pounds paraffin wax
- 2.5 ounces stearin
- 1 disk wax dye
How To:
- Insert string of wire-core wick into the wick holder and place it in the center of the tin.
- Melt wax dye and stearin in a double boiler over medium heat.
- Pour the melted wax into the tins, covering ½ inch of each wick. Allow the wax to cool for 30 minutes to an hour.
- Wrap the wicks end around the tie rods and affix the rods on top of the containers.
- Now pour the melted wax and fill within 1 inch of the top. Leave it to cool for an hour or overnight.
- Remove the tie rods and trim the wicks to ¼ inch. The candles are ready.
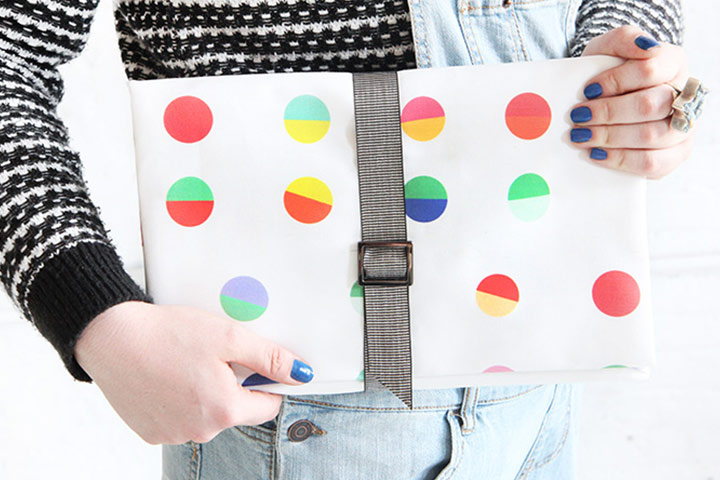
6. Envelope Laptop Case
Image: ispydiy.com
You Will Need:
- Your choice of fabric
- Felt cut to size
- Crafting slide buckle
- Ribbon
- Marker
- Fabric glue
- Scissors
- Ruler
- Paintbrush
- Laptop
How To:
- Lay out the laptop on the felt, trace and cut it out. Place the laptop on another felt sheet, make a new outline and cut it out. You must have three rectangles equal to the dimension of your teen’s laptop.
- Create the side panels by dividing the length of the laptop in half. Cut out the template.
- Place the felt on top of the fabric of your choice. Make the outline that is 1 inch wider than the felt outline.
- Cut the inside corners of the material, fold the excess 1-inch material and glue to the felt.
- Cut out a piece of material from the fabric to cover the inside flap and glue to the felt.
- Now cut out a piece of ribbon and attach to the back of the case using hot glue gun.
- Secure the slide by applying glue to the ribbon and folding it towards the case.
- Slip the ribbon through the slide to fasten the case.
Isn’t it a good Christmas gifts for teens?
7. Jewelry Storage Frame
Image: blog.monaluna.com
You Will Need:
- ½-plywood backing, cut to size.
- White paint
- Old frame
- Hooks and screw eye hooks.
- Screws
- Glue
- Stapler
- Wire mesh
- Wire cutter
How To:
- Measure out the layout considering the length of the necklaces and the number of earring hooks you want and where you wish to place the mesh screen.
- Screw the earring and necklace hooks to the ply board. Put the hooks in such a way that they don’t interfere with each other.
- Stick the plywood backing to the wooden frame using a hot glue gun and paint the whole thing white.
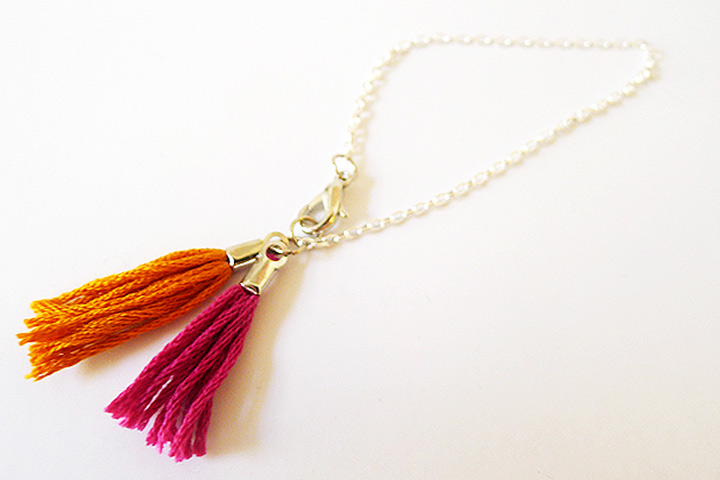
8. Tassel Bracelet
Image: thanksimadeitblog.com
You Will Need:
- Embroidery thread
- Clasp
- Chain that should be long enough to tie around your teen’s wrist.
- Jump rings
- Fold over crimp ends
- Pliers and scissors
How To:
- Wrap the thread several times around the fingers to make a bundle.
- Put one end of the roll in the fold-over crimp end and close it using pliers. Repeat the same method for other embroidery thread.
- Trim the bundle to even the ends of the tassel.
- Attach the fold ever ends to the jumping ring and affix to one end of the chain. Affix the second jump ring to the other end of the chain. The bracelet is ready.
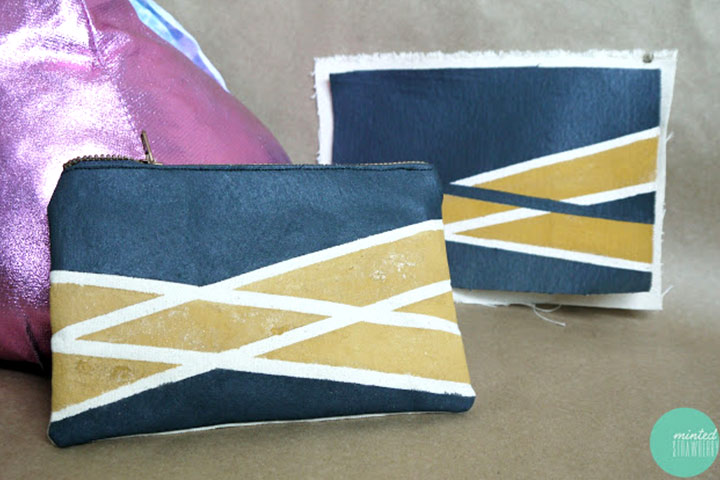
9. Artsy Pouch
Image: Source
You Will Need:
- Heavyweight canvas fabric.
- Lining fabric
- Zipper
- Acrylic Paint
- White fabric paint
- Sponge
- Sewing machine
- Masking or painter’s tape.
How To:
- Cut out 4 equal sized strips from the tape. 1/4th inch wide strips would be perfect.
- Cut out the canvas fabric to the pouch size, leaving ½ inch seam all around.
- Stick the two tape strips horizontally on the pouch. The strips should be parallel to each other.
- Tape the remaining two strips on the canvas. Even these two strips must be parallel to each other.
- Mix acrylic paint with white fabric paint. You’ll get a lighter shade than the original. Make sure you test the color combination before applying to the canvas.
- Gently paint the outer sides of the canvas first.
- Now paint the remaining part, using different colors. Do not dab excess colors as it can leave cracks. Gently remove the tape and leave it to dry overnight.
- Iron the backside of the canvas when the paint has dried. Stitch the pouch along with the zipper.
10. Mason Jar Christmas Candles
You Will Need:
- A long strip of sack
- Mason Jars
- Ribbon
- Tea light Candles or pillar candles.
- Artificial snow
- Red berries
How To:
- Put some fake snow at the bottom of the jar. The artificial snow layer must be 3 inches thick.
- Top it with red berries and place the candle in it.
- Tie the mouth of the jar, first with a sack and then with ribbon.
It is a cool Christmas gifts for teens.
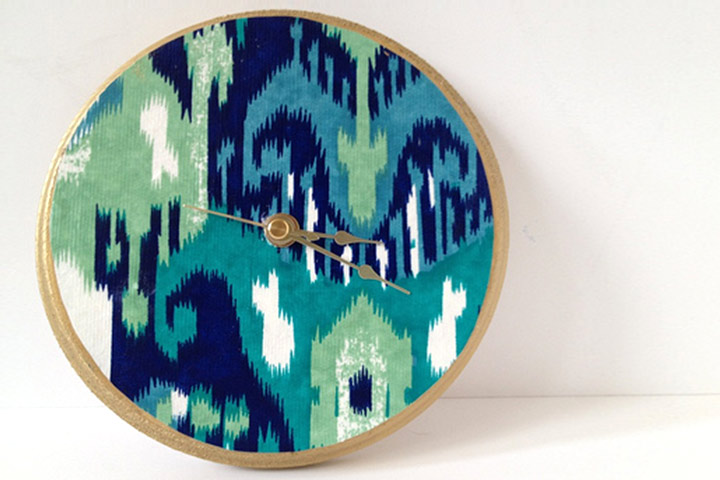
11. Gift Wrap Clock
Image: fabricpaperglue.com
You Will Need:
- Decorative gift-wrap
- Mod Podge
- 6-inch wooden circle
- Golden paint and paintbrush.
- Clock kit
- Drill
- Sponge brush
How To:
- Paint the edges of the wood circle in gold. You can paint it in any color that complements your gift wrap.
- Drill a hole in the middle of the wooden circle. The hole should be big enough to fit the clock kit.
- Trace a circle on the gift wrapper paper and cut it out neatly.
- Stick the circle to the wooden disk using glue or Mod Podge.
- Apply a layer of Mod Podge over the gift wrap. Leave the glue to dry for a few hours.
- Install the clock kit and set the time.
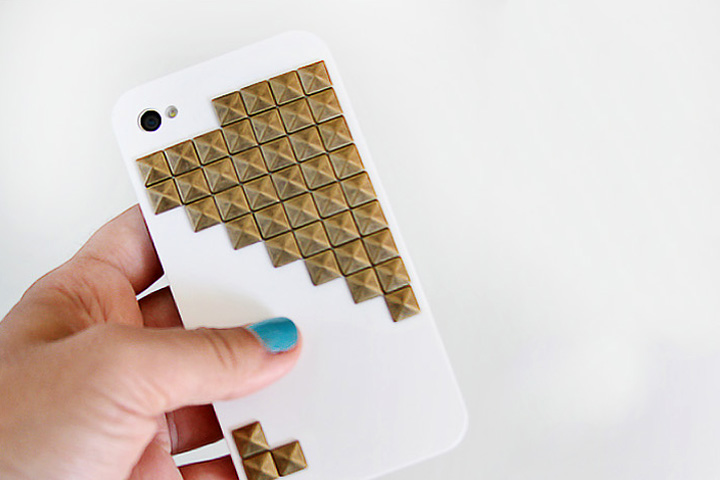
12. Studded iPhone Case
You Will Need:
- iPhone case in white or black
- Studs, (the studs should not have legs).
- Pencil
- Ruler
- Glue
How To:
- Lay out the design on the iPhone case using a pencil and ruler before gluing anything.
- Put a small amount of glue on the phone case and stick the studs on it. Do not rush through this method. You have to maintain straight lines, so take your time.
- When you have glued the studs, leave it aside for 24 hours.
- When it has dried completely, present it to your teen. Instead of studs, you can also use stones or sequins. Teens love shiny stuff.
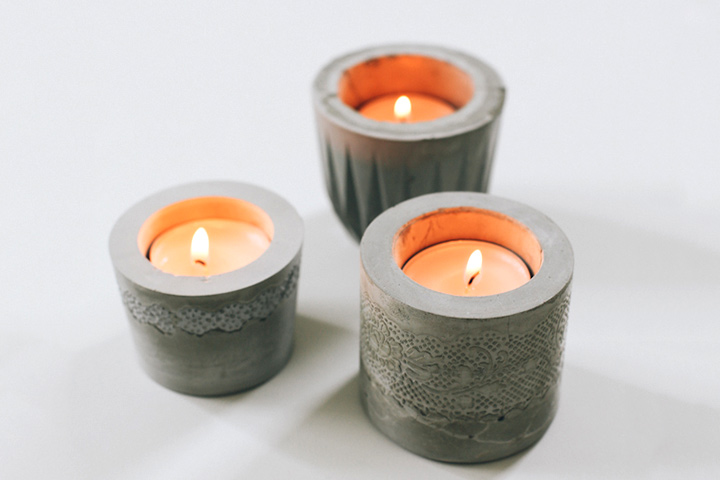
13. Cement Votive Holder
Image: sayyes.com
You Will Need:
- Cement powder
- Paper cup
- Wooden sticks
- Coins
- Petroleum Jelly
- Sticker tape
- A disposable container for the outside of your votive.
- A smaller disposable container that should be big enough to hold a tea light.
- Pliers
- Sandpaper
How To:
- Cut and stick the tape to fit around the large, disposable container.
- Lubricate the inside of the container with petroleum jelly.
- Peel off the sticker and wrap it around the inside of the container, closer to the bottom.
- Add some cement and water to the paper cup and mix using the wooden stick until you get smooth paste.
- Lubricate the outside of the container and pour the cement into it, until it covers the sticker.
- Put a few coins in the smaller container and push into the center. Put some more coins in it to weight it down. Leave it to sit for 24 hours.
- Now tear off the outer container and peel off the sticker. Use pliers to take out the smaller container. Leave it to sit for another 12 hours.
- Once the votive dries, turn it over and sand the top rim to make it flat and even.
- Put the tea light or small candles in it and gift wrap.
14. M And M Cookie Mix
You Will Need:
- 1 box of chocolate fudge cake mix.
- 1 packet of M&Ms baking bits.
- 1 wide mouth mason jar.
- Ribbon
- Scrapbook paper
How To:
- Cut out a label from the scrap paper and write the baking instructions on it.
- Empty the cake mix package into the mason jar and pat down the top gently.
- Cut and pour the M&M baking bits into the jar.
- Cut out a circle shape from the scrapbook paper and place on top and screw the lid.
- Tie a ribbon bow around the middle of the jar.
- Affix the label to the ribbon and your project is ready.
It can be one of the best Christmas gifts for teens.
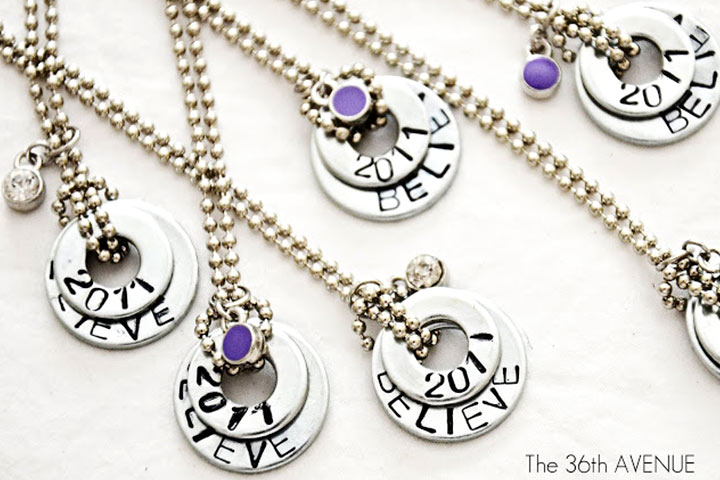
15. Washer Necklace
Image: the36thavenue.com
You Will Need:
- Washers in different sizes.
- Steel stamps
- Hammer
- Chains
- Embellishment
- Sharpie
How To:
- Stamp the washer using the steel stamps and hammer. You can write anything you like on the washers. Do this step on a solid surface, concrete preferably. You just need to hammer the stamps three to four times to engrave the letters.
- Give some character to the engraved letters using a sharpie. Clean the excess with damp cloth.
- Thread the washers through the chain and decorate with embellishments.
16. Multi-Strand Scarf
You Will Need:
- 1 old and big, seamless T-shirt.
- 1 pair of scissors
- 1 ruler
How To:
- Chop off the bottom of the shirt.
- Cut one to two-inch horizontal strips across the t-shirt, right from the bottom to the armpit. The more strips you get, the more strands the scarf will have. You can even use a ruler to make straight lines across the shirt. And don’t worry. They don’t have to be perfect.
- Leaving the bottom hem, stretch the remaining strips until they become long, and the edges start to roll inwards.
- Cut an end of the bottom hem to make it a string. Wrap the strip around the center of the scarf and back. Knot the ends tightly.
- Trim the ends and tuck the knot under the wrapped fabric. You’ve got a stylish scarf to gift to your teen.
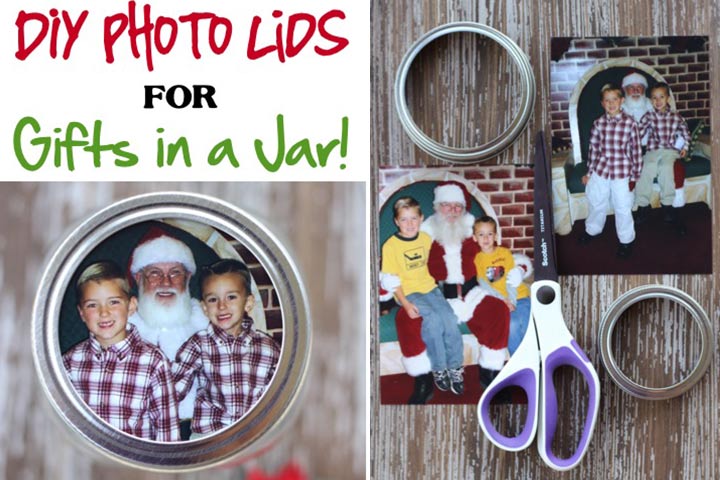
17. Photo Lid Jar
Image: thefrugalgirls.com
You Will Need:
- 4*6 pictures of your teen and his/her friends.
- Mason jar and lids
How To:
- Trim down the photos to a circle. It should be of the same size as the jar’s topper.
- When you have filled the jar with candies, place the silver topper on the jar followed by the photo. Now screw on the lid ring.
- Decorate the jar with sequins and ribbon.
It can be one of the popular Christmas gifts for teens.
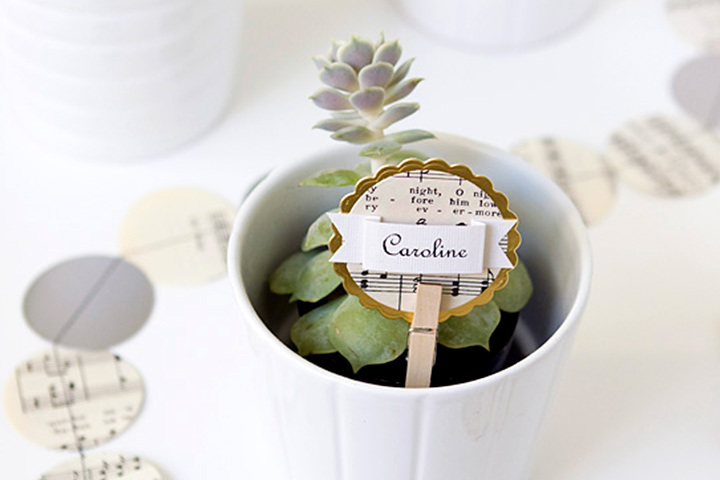
18. Christmas Name Card
Image: armelleblog.com
You Will Need:
- Gold poster paper
- Music sheet
- Nesting scalloped circles
- White textured cardstock
- Mini clothespin
- Mini plants pots
How To:
- Cut out the gold poster paper using the nesting scalloped circles.
- Cut out circles from the music sheet. The circles should be 2 centimeters smaller than the gold poster paper.
- Print out the names of his friends on the white, textured cardstock paper.
- Stick the music sheet circle to the golf scallop. Fold the name strips on each end and stick to the middle of the circle.
- Put a mini clothespin at the bottom of the name cards.
- Affix the name cards inside the mini pot plants.
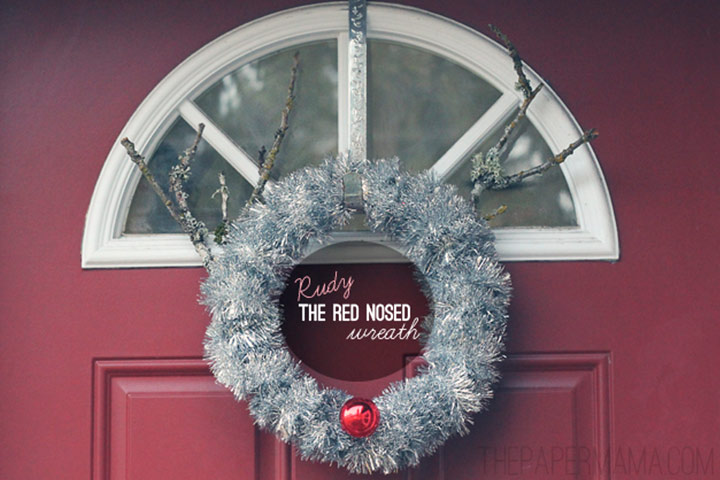
19. Rudy, The Red-Nosed Wreath
Image: thepapermama.com
You Will Need:
- 2 packages of silver garland.
- Wreath
- Hot glue gun
- Glue sticks
- 12 inches long wire
- Red glass ornament
- 2 to 4 branches that look like antlers.
- Masking tape
How To:
- Attach the branches (antlers) to each side of the wreath using masking tape.
- Now wrap the silver garland or tinsel around the wreath. Begin by gluing one end of the tinsel or garland with hot glue and wrapping it around. Glue the end too.
- Thread a 6-inch long wire through the loop of the ornament and place it on the wreath to make a nose. Wrap the wire nearly on the wreath. It’s done!
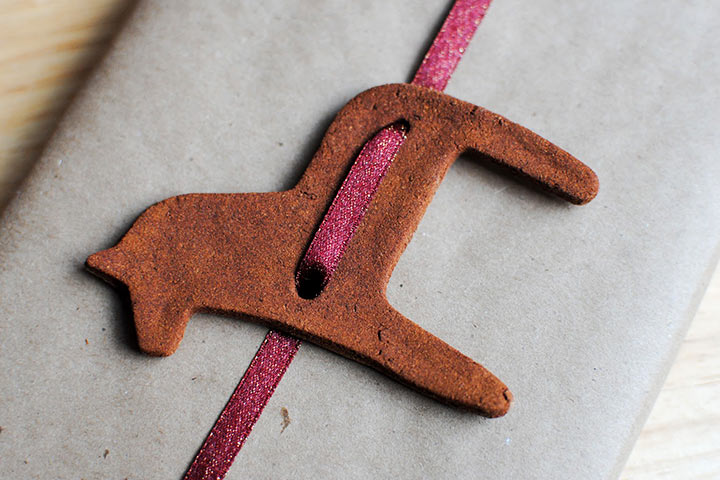
20. Cinnamon Gift Tag
You Will Need:
- Cinnamon
- Ground cloves
- Ground nutmeg
- Apple sauce
- Glue
- Mod Podge
- Ribbon
How To:
- In a small bowl, mix ground cinnamon, cloves, nutmeg, apple sauce and glue.
- After a bit of mixing, you will notice dough coming together.
- Roll the dough with rolling pin, sprinkling some ground cinnamon on the top.
- Once the dough is of even thickness, cut out the tag using a horse or reindeer shaped cookie cutter. You can use gingerbread man, Santa and star shaped cookie cutter too.
- Punch holes on one side of the tag using a straw.
- Brush Mod Podge over the tags.
- Thread through a ribbon and the tag is ready.
Christmas gifts are joyful surprises that add an element of fun and excitement to Christmas celebrations. If you are struggling to find a suitable gift for your teen, check this list of Christmas gifts for teens. This list has many gift ideas, including body and foot scrubs, jewelry boxes, and laptop cases, to help you find a suitable gift for your teen. What’s best, you can make these gifts at home. So, select a gift you would want to give your teen and embark on a DIY journey to make a customized Christmas gift for your teenager.


