


Image: Shutterstock
Crafts form an essential part of growing up, and cardboard box crafts for kids are just another way to fuel creativity and imagination. Cardboard boxes can be transformed by children into a variety of imaginative crafts, such as aquariums, telephone booths, ships, carts, and other remarkable creations that can serve as both game props and gifts.It’s the perfect activity to keep kids engaged when they are bored. It helps boost their imagination and improves their motor skills. Your kid could be an arts and crafts genie for all you know!
Cardboard boxes are one of the most versatile items for creating unique crafts.Recycling cupboards can reduce wastes and upcycling it into something new gives it a second life and reduces the need for new materials, thus making it an eco-friendly material.By teaching kids to repurpose cardboard boxes, we are promoting sustainable practices and reducing waste in our environment.So, if you’re looking forward to introducing your child to this fun prop, do it! You can also go through our list below for cardboard box craft ideas and get the creative juices flowing.
Simple Cardboard Box Craft Ideas For Kids To Try
1. Red cardboard barn

Image: joyfullyweary.blogspot.com
You Will Need:
- Milk box
- Paintbrush
- Primer
- X-Acto knife
- Green painter’s tape
- Red and black tempera paint
- Rollers
How To:
- First and foremost, tell your kid to give the shape of a barn to the cardboard.
- Now he has to make the door by using the X-Acto knife. It has to be a double door.
- Now tell him to paint the barn with the primer and outline the door and window using green painter’s tape. Leave it overnight to dry.
- Now let your kid paint the barn red and the roof black with the rollers. Leave it to dry for some time.
- When the paint dries, pull off the paint tape carefully. This cardboard barn for kids is a perfect playhouse for children to have fun.
An anonymous blogger and mom talks about how her children made a little red cardboard barn and had great fun while doing the same. She says, “I stumbled upon this perfectly sized milk box (4 gallons per box) while subbing and thought it would be sturdy enough to handle play. Hubandie (her husband) and the boys used an x-acto knife and wood glue to build a barn shape. We then painted with a basic primer and outlined a window and a door with painters tape. Big Buddy (her son), however, insisted that we add more windows so it looked like the barn in our book The Big Red Barn. Once everything was taped I let the boys paint the barn with rollers and washable, red tempera paint.The boys really enjoyed working together and broke out into fits of giggles several times.We let the red paint dry and then Big Buddy used a foam brush and washable, black tempera paint to do the roof. When all the paint was dry we pulled off the tape…And started enjoying our brand new toy (i).”
2. Cardboard airplane

Image: smallfryblog.com
You Will Need:
- 1 medium sized cardboard box
- Packing tape
- Scissors or X-Acto knife
How To:
- Cut off one full flap and half of both the flaps and tape the remaining sides. Children can even secure the inside flap for extra support.
- Now tell your kid to flip over the box and cut off all the four flaps. These flaps will be used to make the wings, propeller, and tail.
- Now your kid has to cut out the armholes from the box. Just draw a semi-circle near the taped side and cut it off. Repeat the same method on the other side.
- Make slits on both sides of the box for the wings.
- Draw and cut out the wing shape from the flap and insert into the slit. Flip and tape for support.
- To make the tail, tell your kid to take a large sized cardboard piece and make a slit in the middle. Now insert a small sized cardboard in the slit.
- To make the propeller, take a rectangle-shaped cardboard, trim the bottom ends, and tape them together.
- Make two different sized circles. Place the propeller on the bigger circle and affix with glue. Now stick the smaller circle over the larger circle.
- Affix the propeller to the box. Your airplane is ready. Make these simple cardboard planes for kids and have fun like never before.
 Quick tip
3. Cardboard camper playhouse
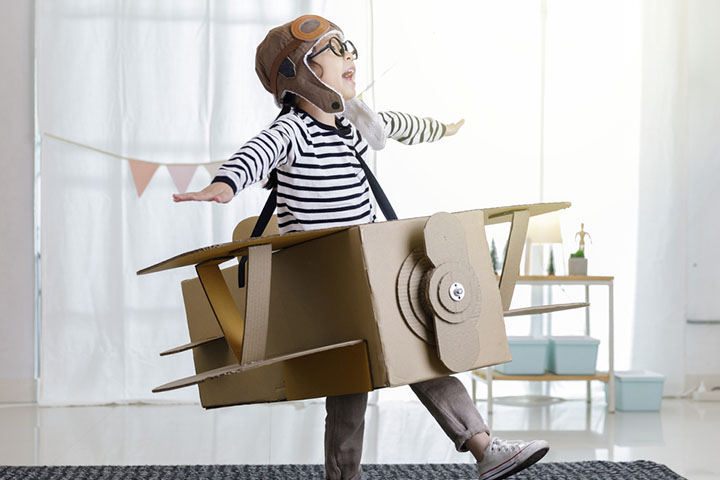
Image: Shutterstock
You Will Need:
- Large sized cardboard or two big boxes
- Duct Tape
- Black construction paper
- Box Cutter
- Tape
- Paintbrush
- Paint
How To:
- Break two big boxes and tape along the seams for extra support. It will be the two long sides of the house.
- Now take another piece of cardboard and bend or curl it so that it looks rounded.
- Tell your kid to lay all the three pieces of the cardboard face down. Tape them together along the edges on the front, back and sides, and flip it over.
- Now cut five slits in the cardboard on both ends, just along the rounded top. Tape them in place.
- Now cut out pieces of cardboard for the ends and tape them in place along the inside and outside. Make sure your kid bends or curls the top part of the ends so that it fits into the curved top.
- Tell your child to draw and cut out the door and window. Now have them painted in silver and leave them to dry overnight.
- Draw and cut out lights, license plates, and hitch from the black cardboard and stick them on the cardboard.
4. Old granny handbag

Image: ikatbag.com
You Will Need:
- Cardboard
- Tape
- Scissors
- Gusset
- Chenille stem/pipe cleaner
- Pope dot beads
- Buttons
- Glue dots
How To:
- Tell your kid to cut out two handbag shapes from the cardboard pieces and 5” gusset of thick craft paper.
- Now tell him to cut off the edges of the gusset, wrap around the curves and stick using the strong glue. You can even reinforce the sides with the clear packing tape.
- Punch holes on each side and twist half of a pipe cleaner or a chenille stem to make a loop.
- Tell your little crafter to thread the beads onto the chenille stem and twist the ends through the handbag’s loop.
- Allow your kid to decorate the bag with stickers or any other decorations that they like.
5. Cardboard car
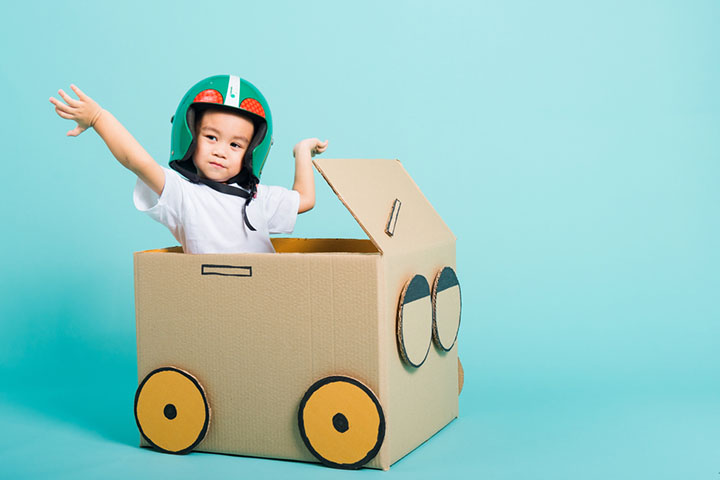
Image: Shutterstock
You Will Need:
- Cardboard boxes of the same size (the boxes should be large enough for your kid to sit)
- Tape
- Adhesive book covering
- Scissors or X-Acto knife
- White and black card
- Plastic door handle
How To:
- Arrange the three boxes on a shelf. Starting from the left, tape the first box shut. For the second box, tape the bottom only and for the third, tape just the top.
- Cover the top of the boxes 1 and 3 with the adhesive book covering.
- Cover the long sides with the adhesive covering. It will tape the three boxes together.
- Bend or cut off one of the flaps of the middle box. The remaining flap will serve as the windscreen.
- To make the car door, tell your kid to make the shape of the door on the cardboard and cut it out, leaving one side attached to the hinge. Neaten the raw edges with the strips of adhesive book covering. Tell your kid to make the door only on the one side of the car. Attach the door handle on the door.
- To make the windscreen, draw the windscreen on the cardboard box and cut it out using the X-Acto knife. Now stick to the fold of the box using the packaging tape. Cover the windscreen with a different colored book covering.
- To make the wheels, tell your kid to cut out the wheel shapes from A3 black card. Cut a circle from the gray book covering to make the hubcaps. Attach to the wheels using the craft glue.
- For the headlight, cut out circles from the white car of paper and attach to the car using the craft glue.
- For the car seat , fill the shoe box with some unused heavy stuff and put it in the car.
- Now coming to the steering, tell your kid to draw and cut out a steering shape from the cardboard and paint it black.
- Attach it to the inside of the car and put hot glue on a bottle cap in the middle. Voila! Make these beautiful cardboard crafts for kids.
 Point to consider
6. Cardboard box guitar
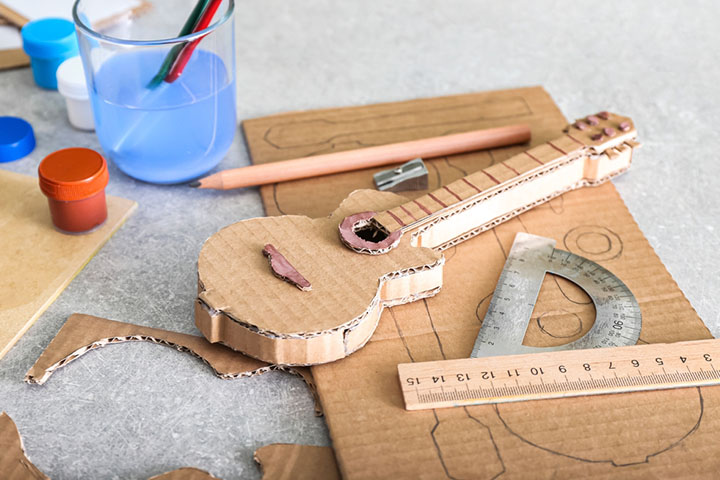
Image: Shutterstock
You Will Need:
- A large sized cardboard box
- Pencil
- Utility knife
- File folder rubber band
- Driller
- Wooden dowel
How To:
- Cut big pieces of the cardboard box.
- Now tell your kid to trace and cut out three ukulele shapes from the cardboard pieces. Make a circle at the center of the body of the guitar cutouts and cut them out.
- Now trace and cut out two shortened pieces of the cardboard again.
- Using a hot glue gun, tell your kid to attach two big cardboard pieces together.
- Cut two pieces of wooden dowels, 1 ½ inch and 2 ¾ inch each.
- Make a 5-inch line 2 to 3 inches below the circle. Now make 4 dots half an inch below the line. Make a slit on the line using a utility knife, push a dent in it, and lay the bigger dowel piece. Secure with a hot glue gun.
- Drill holes in the two layers of the cardboard, exactly where your kid made the dots.
- Now tell your child to make a 1 ½ inches line right below the guitar neck curves on the top. Make four dots above the line, 1/3 inch apart. Following the previous method, make a shallow cut along the line and stick the smaller dowel piece into the crease. Your kid even had to make little dents on the dowel to keep the guitar strings in place.
- Cut open four rubber bands and tie the ends along the long side of the 1-inch paper clip.
- From the back of the guitar, tell your kid to thread the other end of the rubber band through four holes of the guitar neck.
- One by one, tell your child to pull the rubber band along the front of the guitar and through the drilled holes towards the bottom
- Tie the other end of the rubber band to a paper clip stuck on the backside of the guitar. Trim off the excess.
- Place a generous amount of glue on the back of the guitar that has strings and place the third full sized guitar piece on it. It will cover up everything.
- Stick two smaller pieces of the guitar to the back of it. It will give the guitar thickness and durability. Trim off the uneven edges using a utility knife. The guitar is ready. It is an excellent cardboard crafts for children to have fun during the holiday season.
7. Cardboard box elevator

Image: repeatcrafterme.com
You Will Need:
- 24 mm Googly eyes
- 1-inch Number stickers
- Cardboard box
- A pair of scissors
- Utility knife
- Brad tack
How To:
- Either print out the numbers on the sticker labels or use the number stickers.
- Tell your kid to stick the number stickers on the googly eyes using a hot glue gun. Hot glue the numbers on a piece of cardboard. Stick the number cardboard on the inside of the box.
- Now cut off one small flap so that the box stands properly. Make the floor numbers on the flap.
- Draw and cut out an arrow from cardboard scrap and attach on the top flap using tack.
- Take a small piece of the card, and stick the up and down sticker on it. Attach the cardboard piece to one of the doors. It is an easy cardboard craft for kids to have fun during vacation.
8. Cardboard bunny
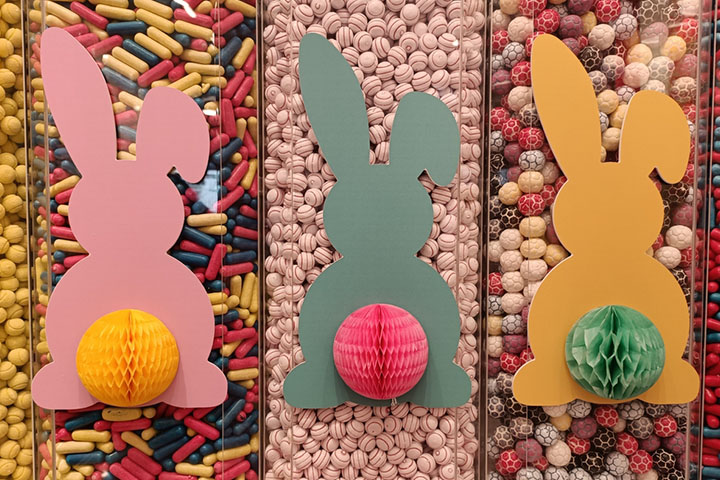
Image: Shutterstock
You Will Need:
- Bunny template
- Cardboard
- Craft Knife
- Glue
- Long Shoelace
- Plastic sewing needle
- Hole Punch
- Glue Gun
How To:
- Download and trace the template on the cardboard pieces. Cut out three pieces of the bunny shape from the cardboard pieces.
- Now tell your kid to punch random holes on the bunny cutout.
- Glue the pieces together and leave it aside to dry.
- Thread the shoelace through the needle and tell him to lace in and out their heart’s content. This is a perfect cardboard craft for kids that helps them to develop their creativity.
9. Craft pirate ship

Image: Shutterstock
You Will Need:
- Cardboard box
- Ruler
- Glue gun
- Black marker
- Pencil
- Twine
- Craft Knife
- Fabric for the sail
- Twigs
- Spreader sticks
How To:
- First, tell your kid to draw the side of the ship on the flat pieces of the cardboard.
- Now tell him to glue the back piece onto the sides. Everything will be locked in just a matter of a few seconds.
- Now glue the base of the ship by running the glue gun along each side.
- Tell your kid to make the L shape from the cardboard piece and glue inside of the back of the boat. It will make the cabin.
- Stick a piece of Styrofoam to the base of the slip, just against the cabin and affix the twig inside the Styrofoam.
- Now tell your kid to stick the spreader sticks horizontally to the twig and wrap some twine around the joints.
- For the sail, cut out star shapes from the burlap and stick them on a square piece of black felt. Even the skull and bone design would look great.
- Punch small holes on both sides of the felt pile and twine around the spreader stick. It’s ready!
10. Cardboard box horse
Image: Shutterstock
You Will Need:
- Three spaghetti cardboard boxes
- Duct tape
- Dowel
- X-Acto knife
- A pair of scissors
- White sticker paper
- Googly eyes
How To:
- Tell your kid to tape both the boxes together for the head and a separate one for the neck. Now tell him to cover each section completely with the tape.
- To make the nostrils of the horse, cut a piece of duct tape and place it on the sides of the boxes.
- Using the X-Acto knife, cut out the nostril shape and peel the tape off.
- Now tell him to tape both the boxes together to give the shape of the horse. Leave about an inch at the top for the ears.
- Cut two pieces of duct tape of the same length of one spaghetti body and tape to the sides.
- Cut the fringes along the tape and stick on the length of the box for the mane.
- Now stick two pieces of tape together and cut out the shape of the ears. Stick it on the sides of the box.
- For the mouth, your kid can use a white sticker paper and draw the mouth on it using a sharpie.
- For the eyes, you have to use cupcake holders and googly eyes.
- Now with the X-Acto knife, cut an X at the bottom of the single box and stick in the dowel. Secure it with a few pieces of tape. The horse is ready for the ride.
 Do remember
11. Cardboard box dollhouse
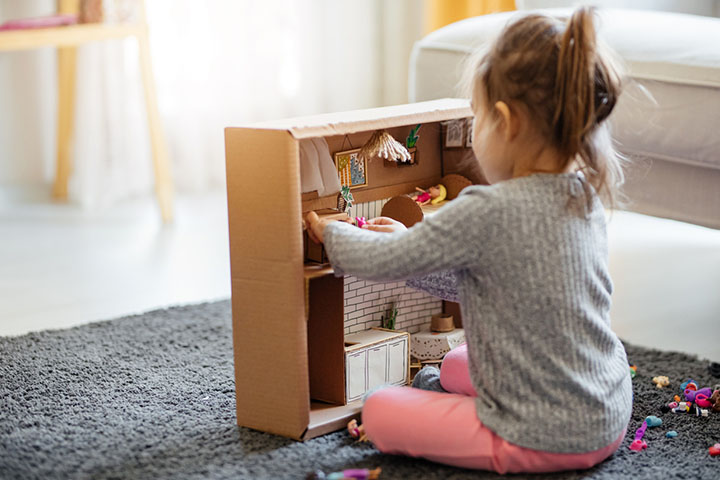
Image: Shutterstock
You Will Need:
- Shoeboxes
- Newspaper
- Cello tape
- Papier Mache mix
- Scrapbook paper
- Paint
- Craft glue
How To:
- Stack the shoeboxes together and secure them together with the tape. The number of shoeboxes will determine the configuration and shape of the dollhouse.
- Now tell your kid to add a layer of paper Mache to bind together the structure and leave it to dry. You can even use an emulsion to paint the paper Mache structure. It gives an even finish in just one coat and dries to a matte finish.
- For the inside, tell your kid to select the favorite scrapbook paper and glue to the insides using standard craft glue. The dollhouse is ready.
12. Cardboard box telly
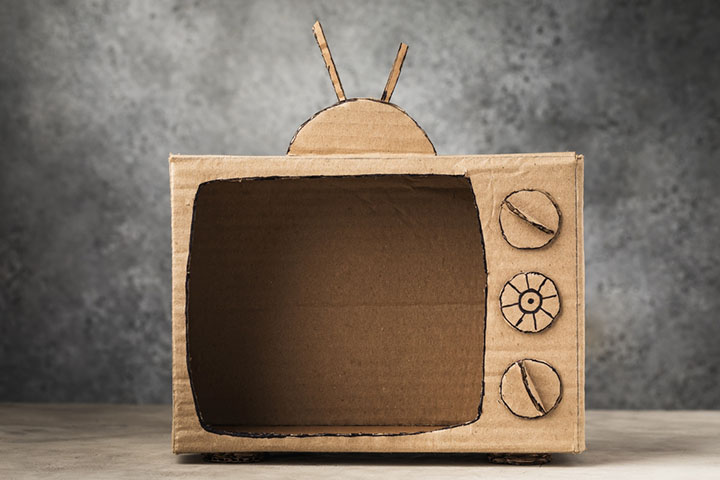
Image: Shutterstock
You Will Need:
- Microwave box
- Buttons
- Chenille stems or pipe cleaner
- Utility knife
- Pompom
- Paint in your favorite color
- Tin foil
How To:
- Have your kid cut out a square from the microwave box. Your kid has to leave four-inch space on all sides.
- Now tell your kid to paint the box in the color of his choice.
- Glue the buttons on one side of the television. It will act as the key to the television.
- Take the pipe cleaner or chenille stems and hot glue a pompom on top of it.
- Now tell your kid to stick the tin foil on the inside of the box.
- For the remote control, take a piece of cardboard and stick buttons on it.
13. Cardboard box rocket

Image: Shutterstock
You Will Need:
- 2 cardboards of the same size
- Packing tape
- A pair of scissors
How To:
- Cut the corner of each box to make a single and flat sheet of cardboard. Reinforce the cardboard sheets by taping over the seams and gaps.
- Now tell your kid to draw a matching rocket nose line at the top of the flattened cardboard boxes. Cut them into the shape of the rocket with scissors.
- Bind together the boxes to give the shape of the cylinder, using the tape. Your kid has to tape the nose of the rocket last.
- Now have your kid make the wings of the rocket using the cardboard scraps and stick at the bottom of the rocket.
- Stick your kid’s name on the rocket and it’s ready.
14. Cardboard castle
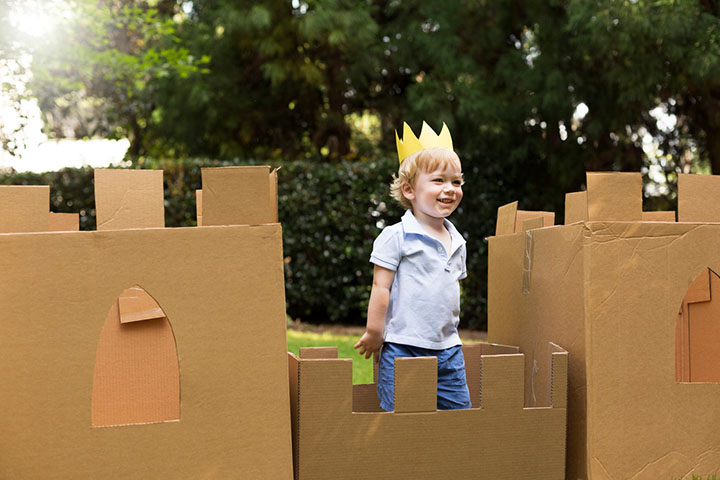
Image: IStock
You Will Need:
- 4 toilet rolls
- 2 kitchen paper tubes
- 1 small cardboard box
- A4 sheets craft paper
- 4 straws
- Tape
- Scissors
- Colored marker pens
How To:
- Cut the small flaps from the box and make small rectangles on top of the castle to make the battlement.
- Cut the kitchen paper tubes in half. You will get four rolls now. Place the tubes on each corner of the box and mark the area where the box meets the tube. Cut a one-inch slit along the marked lines and slip the tubes around the corner.
- Now your kid has to cut triangles from the craft paper for the flag. Secure the triangle to one end of the straws using the tape. Attach the straw to the tubes.
- Now draw the door and window on the craft paper and cut it out. Attach the door and window cut out to the front of the castle using the tape.
- Now cut the shapes of the treetops from the green craft paper.
- Take the toilet paper rolls; make two-inch slits, just opposite each other. Slip the paper treetops into the top of the toilet roll.
15. Cardboard oven

Image: Shutterstock
You Will Need:
- Cardboard boxes
- Utility knife
- Adhesive foam dots
- Hot-glue gun
- Silver spray paint
- Spray paint for the oven
- Four plastic condiment cup lids
- One large bottle cap
- Four small bottle caps
- Full-sheet printable label paper
- Template for knob labels-
- Paper fasteners
- Black permanent marker
- Blank or old CDs
- Ruler
- Double-sided tape
- Sheet protector
- Plastic clothes hanger
How To:
- Tell your kid to turn the box on its side so that the lid opens exactly like the door of an oven.
- Now cut a 13-inch square piece from the cardstock and stick to the back of the oven using the hot glue.
- Using the utility knife, cut a 6 ½*9 ½ inch hole in the box to create the oven door/window.
- Tell your kid to put some adhesive foam dots to the front corner of the box. They must leave the paper backing on the sides.
- Ask your child to punch holes in the back of the cardboard for the dials. Now he can paint the oven in the color of his choice.
- As your kid paints the oven, help him by painting the condiment cup lids in silver and the bottle colors in the same shade as the oven.
- Print the template on the label paper, cut out the knobs and stick to the bottle caps.
- Now ask your kid to attach the silver dials to the oven using the paper fasteners. He now has to hot glue the caps to the lids, covering the fasteners.
- Now with the black marker, tell your kid to draw the burner coils on the CDs.
- Stick the CD burners to the stovetop.
- Now cut 9 ½ * 12 ½-inch rectangle from the cardboard box and paint it silver. When it dries, make lines along the entire length, 1 inch apart.
- Have your kid fasten the sheet protector to the inside of the door using the double-sided tape.
- Cut a long piece from the clothes hanger and paint it silver. When it dries, adhere to the top of the glue using the hot glue. The oven is ready.
Claire Potter, a mom of two and a blogger, shares how she turned a tv box into a cardboard zoo with her daughter. She says, “I was tossing out the box from our new TV into the recycling, when this idea I’d seen years ago popped into my head. I grabbed the box back! ‘Fancy making a zoo?’ I asked my daughter. Her eyes lit up. Never needs her arm twisted to do something creative, that one. We scooped up all the toy animals we could find around the house to see how many enclosures we’d need. We started by cutting strips of cardboard and taping them down to make the enclosures. Then we coloured in the bottoms: green for grass, blue for water, brown for mud. The cut-off end of a foil box made the perfect ticket office. She also found this little stretchy man who was just the right size to make a very enthusiastic ticket seller. And now the zoo was ready for its first visitor (ii)!”
16. Cardboard masks
You will need:
- Pre-cut cardboard oval face shapes
- Pre-cut cardstock spectacles
- Pre-cut cardboard strips
- Bright-colored acrylic paints
- Paint brushes and palettes
- Scissors and a box cutter (for parents)
- PVA glue in small dishes
- Chalk markers
- Colored Sharpies
- Craft pom-poms, washi tape, dot stickers
- Elastic for headbands
- A hot glue gun
How to:
- Tell your kid to choose a colored face shape and then let them draw eyes on the back with a Sharpie. Help them to cut out the eyes with a box cutter.
- Choose a spectacle cutout, and tell your kid to paint or color it with Sharpies and chalk markers, and then glue it on the mask using PVA.
- Let kids express their creativity using paint, sharpies, and stickers, and encourage them to add features like lips and noses.
- Tell your kid to add cardboard strips for a starburst effect, hot glue them symmetrically on the back, and help them decorate with stickers, washi tape, and pom-poms.
- Instruct them to attach a thick elastic through the eye-holes, knot for ease, creating a snug and durable headband. The funky mask is ready.
Frequently Asked Questions
1. How can we make a cardboard box craft age-appropriate for different age groups of children?
Cardboard box craft varies in complexity. Complicated designs that need more work and skill are suitable for older children, while those that do not require significant handling of cutters or pins and can be made by folds and bends are suitable for younger children.
2. What are some safety considerations when working with cardboard boxes and children?
Ensure you do not leave the child unattended with a box cutter or scissors. The adhesive should be mild and not too strong for the child to stick their fingers. Keep pets away from the working area. If your child is too young, avoid items that can become choking hazards.
3. How can I involve children in designing and planning a cardboard box craft project?
Ask your child what they would like to create. Ask them to describe what they want to make, including the color scheme. Then sit with them and tell them how they should plan to create the item.
4. What are some tips for storing and organizing cardboard box crafts once they are completed?
You can store cardboard craft items at a height, atop a cupboard to protect them from being accidentally trampled over, or in the corner of your garage where there is less movement of people.Proper storage and organization of items can help maximize space and minimize clutter.
5. How can we incorporate learning and educational concepts into cardboard box craft projects for children?
Preparing a cardboard box craft enables a child to understand the nitty-gritty of certain things. For instance, if they make a cardboard bunny, they learn about a bunny’s ears, legs, and other parts of the body. In addition, they will remember its features better since they have created it themselves.
Infographic: Simple And Creative Cardboards Crafts For Children
Whether you bought new furniture, accessory, or equipment, after unboxing, the cardboard usually ends up in storage for later use. So, let’s explore some wonderful craft ideas for children in the infographic below using these cardboard pileups in the house. All these crafts are easy to make and will surely provide hours of fun for the children.
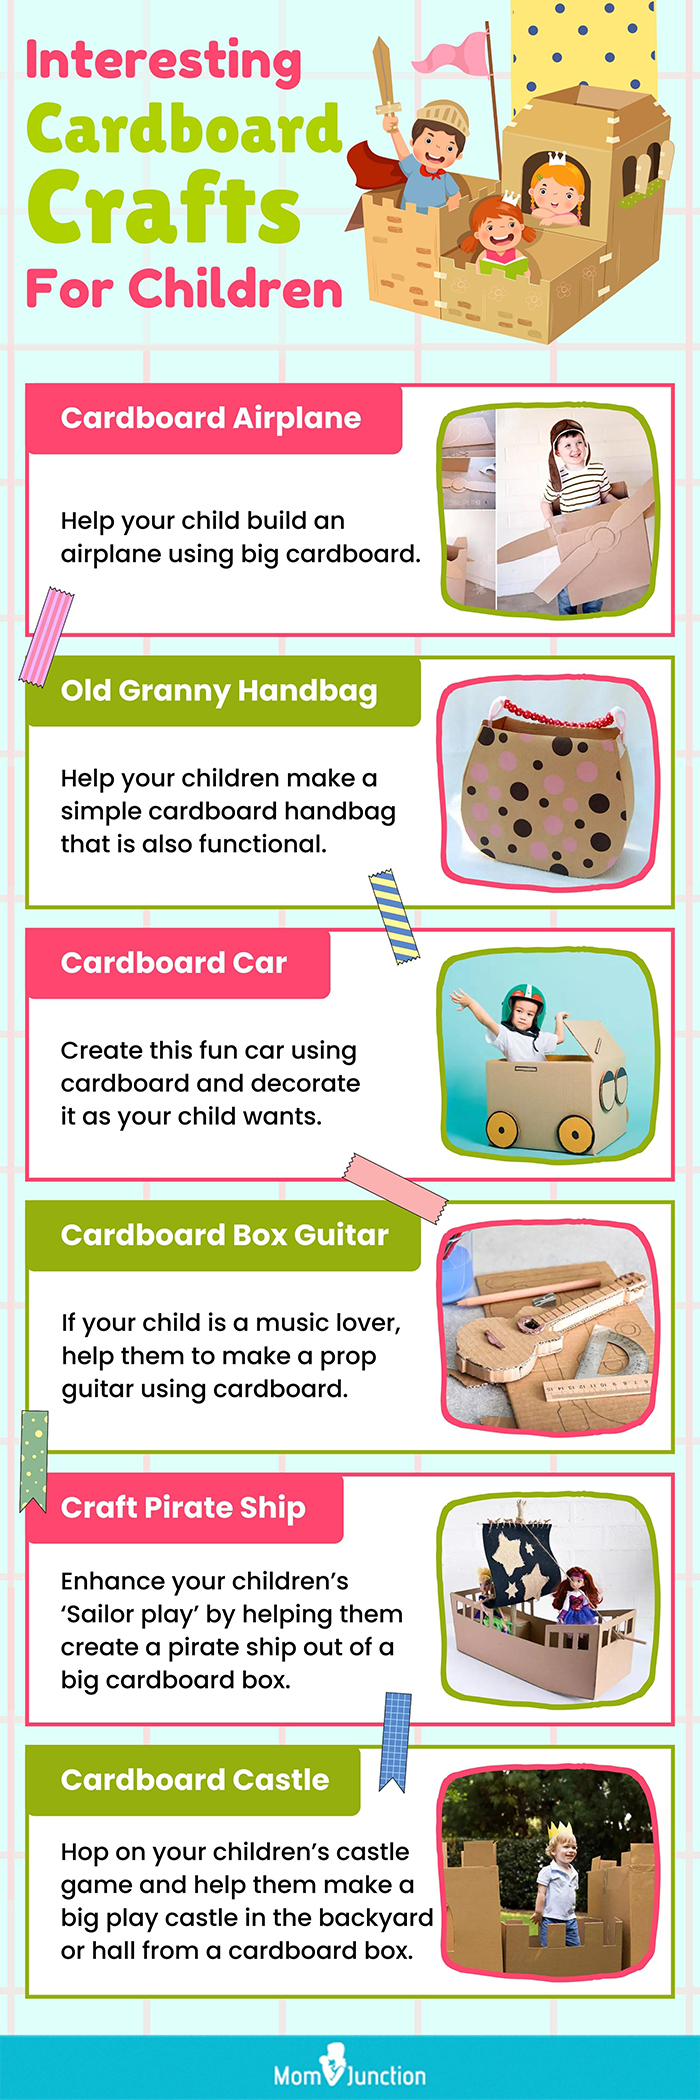
Illustration: Momjunction Design Team
There are plenty of possibilities that you can craft with your kids from the above-mentioned cardboard craft ideas, such as a cardboard airplane, trolley, vehicle, barn, television, or a lovely dollhouse. These delightful cardboard box crafts for kids would keep them busy for hours while also ensuring that they have a good time. Some of these crafts are tough to create, such as a cardboard guitar, but they are well worth the effort. So collect all the big and small cardboard boxes lying around the home and get creative with your children. Just make sure you stay with them if they require assistance and support them in creating their masterpiece.
Key Pointers
- Cardboard activities stimulate creativity and imagination in children.
- Various crafts can be made from cardboard boxes, such as barns, airplanes, playhouses, and purses.
- Creating these crafts can aid in developing children’s motor skills and hand-eye coordination.
- With easy-to-follow instructions and minimal adult supervision, children can build cardboard projects like dollhouses, rockets, TVs, castles, and ovens.
- Cardboard box crafts are a cost-effective and uncomplicated way for kids to express their creativity.

Image: Stable Diffusion/MomJunction Design Team
Engage your children in some fun arts and crafts with these 6 cardboard DIY games for kids.
Personal Experience: Sources
MomJunction articles include first-hand experiences to provide you with better insights through real-life narratives. Here are the sources of personal accounts referenced in this article.
i. A Little Red Cardboard Barn;https://joyfullyweary.blogspot.com/2011/10/little-red-cardboard-barn.html
ii. Thinking inside the box: Make a cardboard zoo;
https://thequirkyparent.blogspot.com/2015/03/thinking-inside-box-make-cardboard-zoo.html


