Image: Shutterstock
Teachers add value to a child’s life, and no words can be enough to emphasize their importance in society. Therefore, children should express their gratitude toward their teachers for their support and guidance. So, here are some meaningful gift ideas for Teachers’ Day to help students convey their gratitude for their teachers. You can help them know this by making a simple heartwarming card or customizing one of their favorite stationery items. So, let your creativity flow and make something special for your teachers. Browse our list of ideas to make a thoughtful and unique gift.
Easy Card And Gift Ideas For Teachers Day
Here are some interesting ideas to help your kid make mementos and cards at home for Teachers Day:
Teachers Day Greeting Card Design Ideas
Here are a few ideas for handmade cards to greet your teachers on their special day!
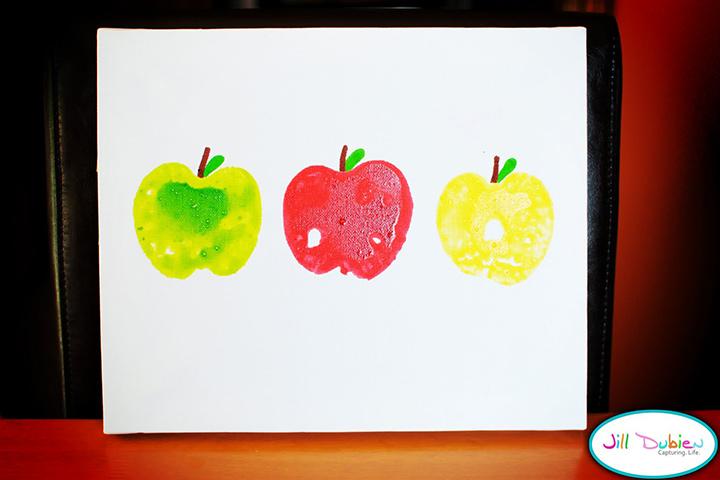
1. Cute Little Apple Card:
Image: Via Source
You Will Need:
- A blank paper
- Paints in red, yellow, and green
- A few apples
- Sketch pens in brown and green
- A disposable plate for each paint
How To:
- You can carefully cut the apples in half and hand them to your kid.
- Pour the different paints in the disposable plates and ask your kid to dip the apples in them.
- Now take the blank paper and fold it in half to form a card.
- Ask your kid to stamp the apple print on the paper. Let him make the imprint in different colors.
- Keep the card paper aside to dry.
- Now, ask your kid to paint the stems and leaves on the card. Help him write a sweet note thanking his teacher inside the card before gifting it.
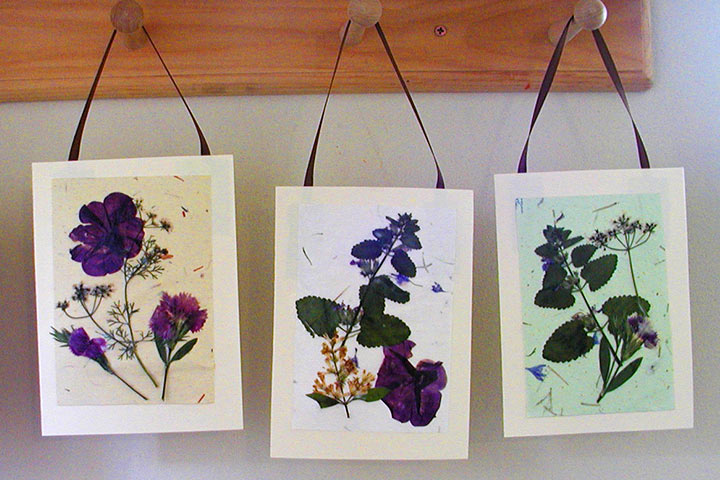
2. Pressed Flower Cards:
Image: Via Source
You Will Need:
- A card paper
- Glue stick
- Mod Podge
- Decorative ribbon
- Tape
- An old paintbrush
- A colored paper
- A pair of scissors
- Dried flowers
How To:
- Help your kid to cut the colored paper into a shape of his choice. Now help him paste it on the card paper.
- Help your kid to form a loop with the ribbon to hang the card. Use the tape to stick the ribbon on the back of the card. Use the glue stick to stick the folds of the card.
- Next, ask your kid to use an old paintbrush to spread the mod podge on the colored paper. Now, help your kid glue the dried flowers on the colored paper carefully. Ask him to add a coat of mod podge, over the dried flowers.
- Ask him to keep the card aside to let it dry completely. He can write a quote on this teacher day card too.
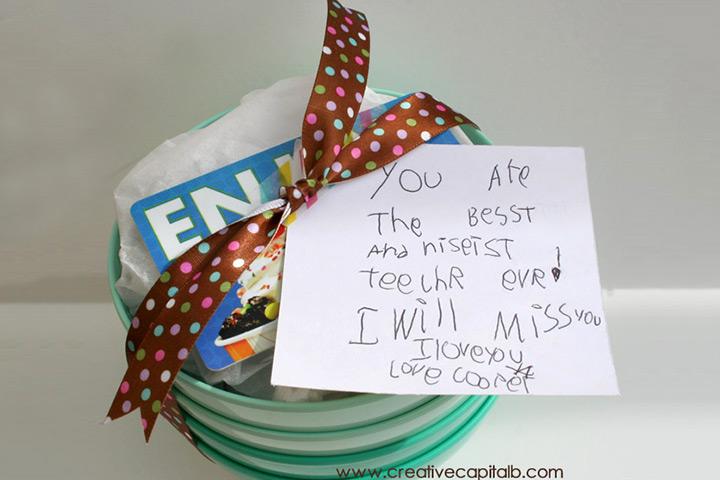
3. Ice-Cream Cup Card Wraps:
Image: Via Source
You Will Need:
- A few small and colorful ice-cream cups
- White tissue papers
- A cute card that has an image of an ice-cream on it
- A string of decorative ribbon
- A pen
How To:
- First, help your kid to stack up all the ice-cream cups.
- Now, ask him to make a paper ball using the tissue papers. The idea is that the white paper ball will serve as the ice-cream inside the ice-cream cups.
- Let your kid write a beautiful Teachers’ day quote inside the card. Let him place the printed card on top of the white paper ball.
- Help your kid to tie the ribbon into a bow around the stack of ice-cream cups.
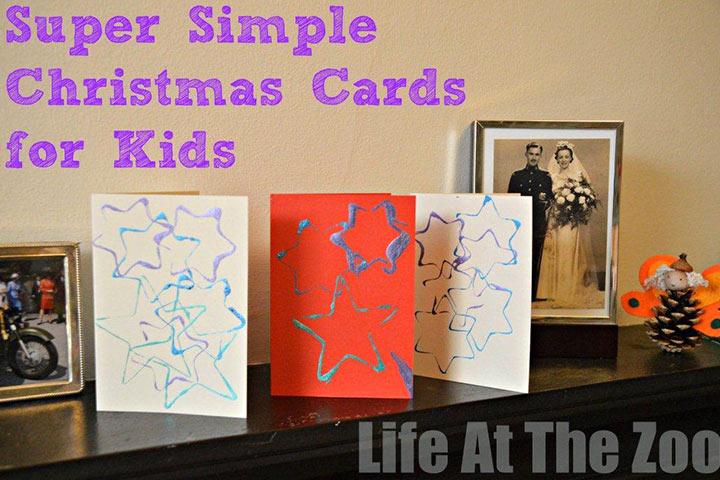
4. Cookie Cutter Cards:
Image: Via Source
You Will Need:
- Cookie cutters in different shapes and sizes
- A piece of card paper in your kid’s favorite color
- A few shades of paints
- A few disposable plates
- A few colored pens
How To:
- Another teachers day greeting card your little one will love to do. Help your kid to pour the paints on different disposable plates.
- Next, ask your kid to fold the card paper in the middle to make a card.
- Let your kid dip the cookie cutters in different paints and stamp different designs on the card paper.
- Ask him to leave the card aside to dry completely.
- Your kid can write a message for Teachers’ day inside the card using the colored pens.
Teachers Day Gift Ideas
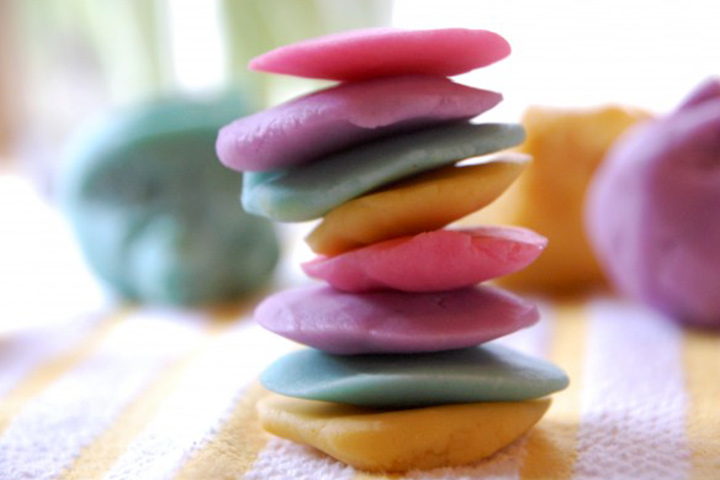
1. Homemade Colorful Play Dough Recipe:
Image: Via Source
You Will Need:
- 2½ cups of water
- A pinch of salt
- 1½ Tbsp cream of tartar
- 5 Tbsp of vegetable oil
- 2½ cups of flour
- A few food colors
How To:
- Let your kid add all the ingredients except the food colors in a big bowl and stir well.
- Help him pour the mix into a pan and cook it slowly over low heat. It will soon become sticky and smooth dough.
- Keep stirring the dough until it is not gooey anymore.
- Remove the pan from the heat and let the dough cool down a little. Now, ask your kid to divide it into different batches for each food color he is using.
- Let your kid flatten out the dough and add a little food coloring to the dough. Now ask him to knead the dough.
- Help your kid to store the colorful dough in separate Ziplock bags and present it to his teacher to use in class.
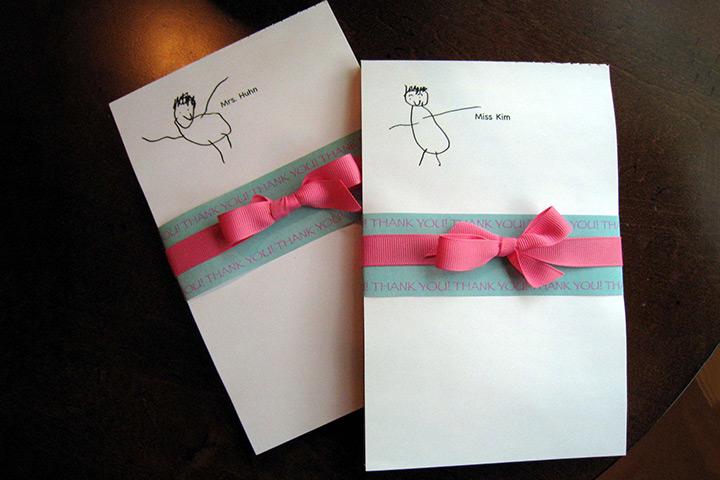
2. Thank You, Teacher Personalized Notepad:
Image: Via Source
You Will Need:
- A plain notepad
- A marker pen in black
- Chart paper in any color and a sketch pen in a dark contrasting color
- Glue
- A string of decorative ribbon
- A pair of scissors
How To:
- Ask your kid to draw a cute picture of a teacher on the front cover of the notepad. He can also write the name of his favorite teacher.
- Now, help your kid cut a long and wide strip from the chart paper. Ask him to decorate it by writing sweet Happy Teachers’ Day quotes on it using the sketch pen.
- Now, help him loop the strip around the notepad and stick its end using the glue.
- Help your kid to make a beautiful bow with the ribbon and stick it on the cover of the notepad.
- Your kid can present this personalized gift to his teacher this Teachers’ day to make her feel special.
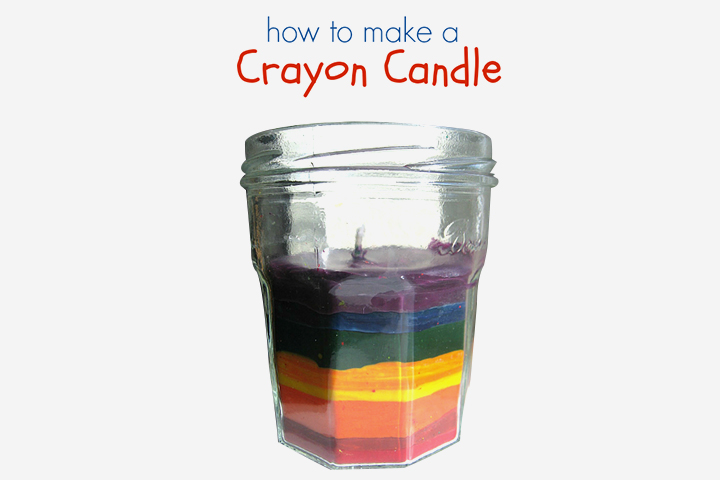
3. Crayon Candles:
Image: notimeforflashcards.com
You Will Need:
- A bunch of wax crayons in different colors
- An old baking dish to melt the crayons
- Some old popsicle sticks to stir the crayons as they melt
- A recycled glass jar
- A long candle wick
- A pair of scissors
- A colored paper
- Sketch pens
- Glue
How To:
- Preheat your oven to 250 degrees F.
- Make sure that your kid peels off any paper labeling on the crayons.
- Now, ask him to break the wax crayons into small pieces to melt them easily. He can use about seven to ten units of the same color to make the different layers of the candle.
- Help him put the crayon pieces in the baking dish and place it in the oven. You can stir the molten crayon with the help of the popsicle sticks. Make sure that he melts the different colors of the wax crayons one by one.
- Now, tell him to place the candle wick in the middle of the recycled jar in which he will be making the candle. Ask him to hold the jar while you pour the melted crayon in it.
- Let the colored wax set. Make sure your kid does not shake the jar as it will make the layer uneven. In the meanwhile, melt the next batch of crayons.
- Pour the next batch of melted crayons and allow the wax to set. Repeat the steps for all the layers.
- Let the colored wax set first before adding the next layer. After adding all the different colored layers of wax, help your kid snip off the wick at the top to complete his candle. He can write a Teachers’ day quote on the colored paper using the sketch pens and paste it on the jar to gift it to his favorite teacher.
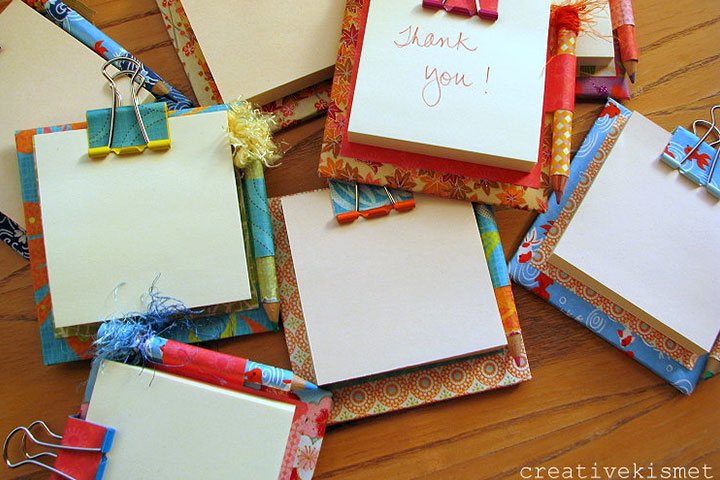
4. Cute Sticky Notes Holder:
Image: creativekismet.com
You Will Need:
- Sticky notes in any color your kid likes
- A glue stick
- Some decorative paper
- Some cardboard
- A few binder clips in different colors
- A sticky magnet strip
- A few colorful pencils
- A pair of scissors
- A measuring scale
How To:
- Help your kid to cut out a big rectangle of 8 X 5 inches from the decorative paper.
- Next, ask your kid to cut out a square of about 3.75 X 3.75 inches and another smaller one of about 3.25 X 3.25 inches.
- For the binding area, ask your kid to cut out two smaller rectangles of the measurements 1.25 X 2 inches and 1.25 X 3 inches.
- Ask your kid to place the large decorative paper rectangle on a firm surface. Next, ask him to place the cardboard in the middle of the decorative paper. Ask your kid to use the scissors carefully and cut out the edges of the paper in such a way that he can easily wrap the cardboard with it.
- Now, help your kid to paste the square paper in the middle of the cardboard. Next, he should glue the rectangular piece of decorative paper to make the tab for the pencils.
- Ask him to take the last piece of paper cut out and glue it on the paper clip to give it a pretty design.
- Help him clip the sticky notes pad on the cardboard using the binder clips. Next, let your kid put the pencils inside the pencil tab.
- Help your kid cut out a piece of the sticky magnet strip and stick it on the back of the cardboard so that his teacher can stick the notepad on her fridge.
It is one of the best teacher appreciation day gift ideas.
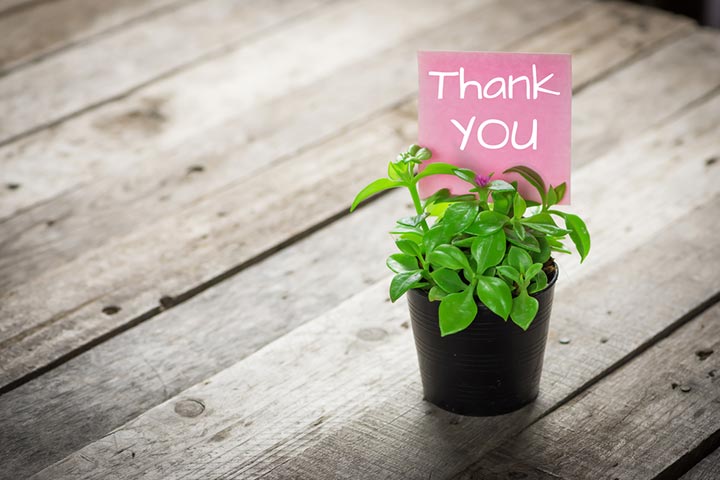
5. Thank You, Plant, For A Teacher:
You Will Need:
- An empty tin can
- Some twine
- A few tags
- A stamp
- Some magnets
- A small strawberry bush
- A little soil
- A mini flag
- A small magnetized board
- A skewer
How To:
- Ask your kid to remove all the labels from the empty tin cans and wash them properly. Ask him to keep them aside to dry.
- Now, ask your kid to stamp the tag and attach them to the tin can using the twine.
- Help him fill up the can with the soil and plant the strawberry bush.
- Ask your kid to attach the mini flag to a skewer. Ask him to stick the end of the skewer into the soil.
- Let your kid place two magnets on the back of the can and display it in a row formation on a small magnetized board.
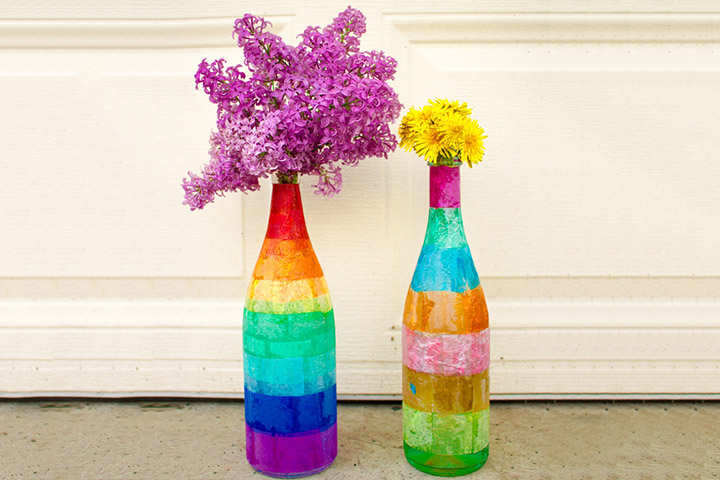
6. Tissue Paper Designer Vases:
Image: craftingagreenworld.com
You Will Need:
- An old glass jar
- Some tissue papers in different colors
- Glue
- Water
- An old paintbrush
- An old bowl
How To:
- Ask your kid to tear up the tissue papers into small pieces.
- Now, let him add some glue and water in equal amounts in an old bowl. Ask him to stir well.
- Now ask your kid to coat the glass jar with the glue mix using an old paintbrush.
- Now, let him start pasting the pieces of tissue paper on the outside of the glass jar until he covers it completely.
- Ask him to keep the jar aside to dry.
- Your kid can add a tea light or a bunch of flowers to use the jar as a candleholder or a pretty flower vase.
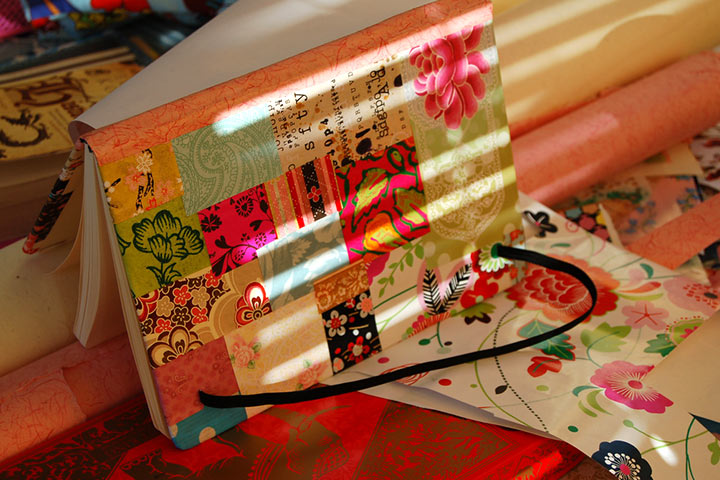
7. Paper Patchwork Notebook Cover:
Image: ihanna.nu
You Will Need:
- Any notebook that your kid wants to gift his teacher
- Few colored papers
- A glue stick
- A pair of scissors
How To:
- Ask your kid to cut out square and rectangle shapes from the colored papers with the help of the scissors.
- Now let your kid paste the pieces of paper one by one on the front cover of the notebook using the glue stick.
- Ask him to leave the notebook aside to dry properly.
- Once the front side is completely dry, ask your kid to repeat the same steps to decorate the back cover too.
- He can add a poem on Teachers’ day and gift the notebook to his teacher.
Teachers play a crucial role in the development of a child in their formative years. Teachers make every day of a child’s school life memorable and enlightening. While teachers should be appreciated and celebrated every day, teachers’ day is a special day dedicated to these wonderful souls. Encourage your child to try one of these cool craft ideas to make a card for their favorite teacher. Let them use these ideas as a base and get creative by adding some of their ideas to personalize the cards.


