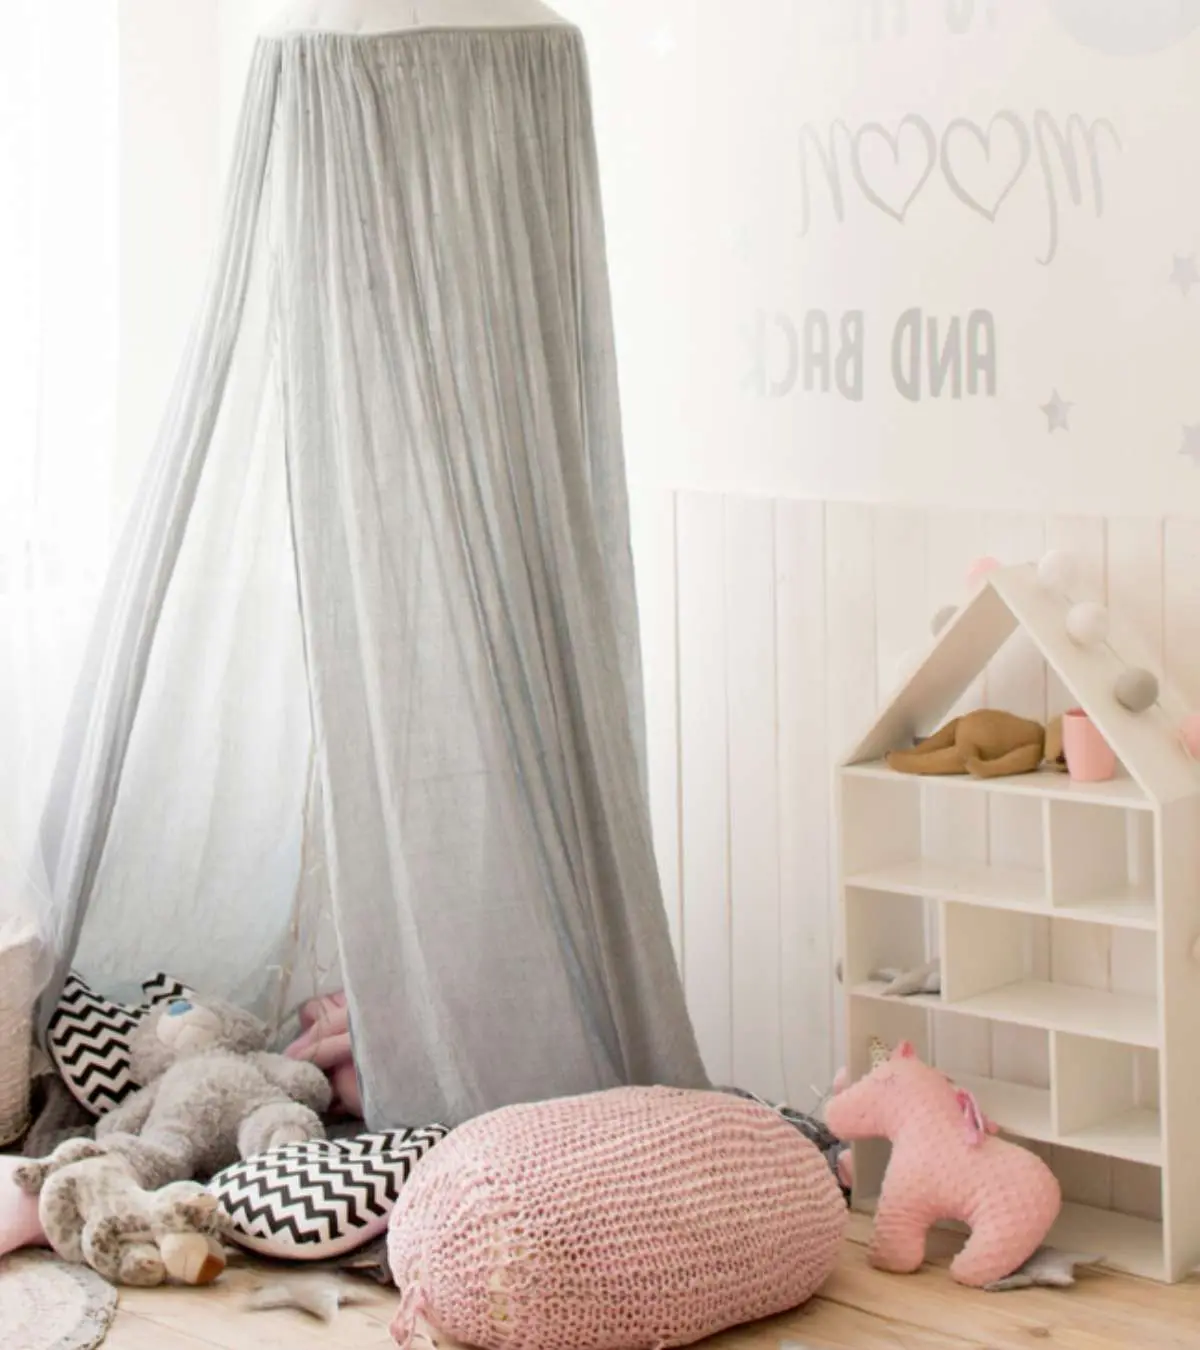
Image: Shutterstock
Building castles and houses are without a doubt one of the favorite activities of children. So, these fort ideas for kids can be a great motivation for their impressive imaginations and limitless energy. Children portray their fantasy through their creativity. For example, they build their castles and forts as a haven for them to relax. If your children like to engage in role-plays and create an imaginary world for themselves, then these DIY ideas for building forts can be an exciting and fun way to do that. Scroll through as we have put together a list of such amazing ideas.

Outdoor Fort Ideas For Kids
If your children enjoy playing outdoors, here are a few outdoor fort ideas which you can try
1. Castle in the clouds
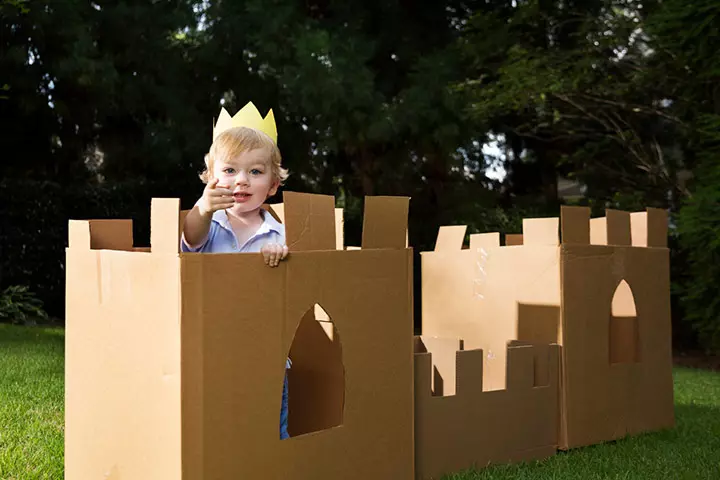
A cardboard castle is fairly easy to make and looks great, too. You can cover it with colored paper or paint on it to make it look more attractive and authentic. When it is not too windy, it can be placed outdoors in a park or playground. Your child will feel like a real king while playing in it.
You will need
- 3 big cardboard boxes (two of the same size and one smaller)
- Scissors
- Strong adhesive
- Color or colored papers (optional)
How to build
- Cut off the flaps from the top and bottom of all the three boxes and cut two to four-inch stripes out of them. Stick these stripes at the upper end of the boxes to form the top of the fort.
- Cut out a section, on each of the big cardboard pieces, on the sides in the shape of windows.
- Cut out a larger part for the entrance on the opposite side of the windows.
- Stick the three cardboard boxes side to side such that the window and entrance side remains free.
- To allow movement between the three sections, you can create a hinge between the boxes so that they can be moved easily.
 Quick tip
2. A-frame fort
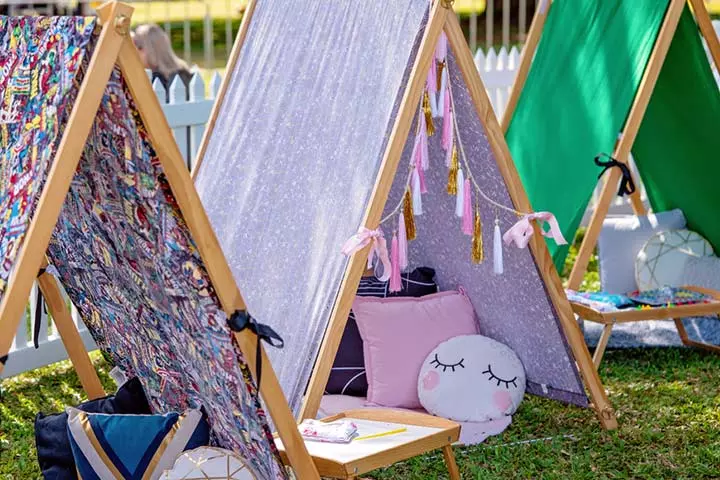
This fort is durable enough to withstand some breeze and can be set in your backyard. The tent-like shape will give your child the feel of camping. It is light and can be easily carried. This fort is a great choice to hide in while bird watching or star gazing at night. You only need a few materials that are easily available at any hardware store to get started.
You will need
- Five ¾-inch diameter and 5 feet long PVC pipes
- Two ¾-inch diameter and 4 feet long PVC pipes
- Four ¾-inch PVC elbow joints
- PVC pipe cutters
- Rope
- Two 50” X 84” tab top curtains
How to build
- Tie the two five-foot-long pipes by crossing the top ends one over another. Do the same with the other two pipes.
- Use the elbow joints to connect the four-foot-long pipes at the bottom of these two joints to form the frame.
- The remaining five-foot-long pipe should be placed horizontally over the joints at the top.
- Place the two curtains such that they cover the two sides of the A-frame and loop them through the horizontal pipe.
- Tighten the curtains across the frame and then pull out the remaining part of the curtain from underneath the bottom pipes to secure them and form the base.
3. Cardboard playhouse

This simple and easy-to-make playhouse can comfortably fit in your backyard. Get your kids some arts and crafts supplies and let them create this to stimulate their creative side. This can be used as a playhouse or just a cozy hideout for your kids.
You will need
- Very large cardboard box
- Few sheets of thick cardboard paper
- Scissors
- Adhesive
- Colors
How to build
- Take the large cardboard box and ensure the base is completely removed.
- Cut out a door and window on one of the sides. Ensure that you leave one side of the door attached so that it can open and close.
- Align the flaps at the top in a way that it creates a raised triangular roof. Tape them together such that they hold their alignment.
- Cut and fit a piece of cardboard paper on the sides of the raised triangular roof.
- Color the playhouse as you wish.
- You can use the remaining cardboard paper to create a fence around the fort.
4. Hoop tent
Hoop tents make playing outside super fun for kids. Turning the backyard into a magical place where games meet camping excitement. By putting hula hoops on the ground in circles, a base for these cool tents is created. Then, colorful sheets are used to make them look like real camping tents.
You will need
- Hula hoops
- Colorful sheets
- Pegs
How to build
- Lay the hula hoops on the ground to form a circular base.
- Drape colorful sheets over the hoops, creating a tent shape.
- Secure the sheets with pegs for stability.
- Add cushions or blankets inside the hoop tent to make it cozy for the kids.
- Decorate the outside of the tent with fairy lights or fabric to brighten the magical atmosphere.
- Rotate the location of the hoop tents for variety, allowing kids to explore different parts of the outdoor space.
 Point to consider
Indoor Fort Ideas For Kids
Be it bad weather or quarantine, if your children are stuck at home, here are some indoor fort ideas to entertain them.
5. Table blanket fort

A table blanket fort can be your child’s special corner. They can participate in indoor and outdoor games and activities for kids. For example, hide and seek and board games, have tea parties, or sit for a story session with you in this fort. It is a simple fort and can be built easily and quickly.
You will need
- Two Blankets
- A few cushions
- Large table
- Twinkle lights (optional)
How to build
- Arrange a large table (you can use a sturdy dinner table) against a sofa or a bed so that the fort stays enclosed on one side.
- Arrange the blanket and cushions between the legs of the table to make the base.
- For the ceiling, choose a large, heavy blanket and lay it on the top of the table.
- You can put twinkle lights, games, and food in the fort to make it more fun.
 Be watchful
6. Indoor teepee

Teepees are great if your child loves to read or play indoor games for kids. They will get their secret spot at home itself. The method given below doesn’t involve any sewing and is easy for children to make.
You will need
- 4 1 ¼-inch wooden dowels with the length of six inches
- ¼-inch rope
- 6” x 9” canvas
- A few screws
- Drill
How to build
- Drill holes on all the dowels about five inches from the top.
- Insert the rope inside the hole of one dowel and tie it at the back. Insert the other end of the rope in another dowel. Do the same for all the dowels.
- Cross the top parts of the dowels across each other and tie them together securely with the rope.
- Wrap the canvas across the dowels evenly.
- Slightly fold the top of the canvas and secure the canvas with a screw. Use a washer if the canvas is thin. Secure the canvas at the bottom of the tepee frame as well.
- You can add blankets and cushions inside the teepee to make it cozy.
7. Clothesline fort
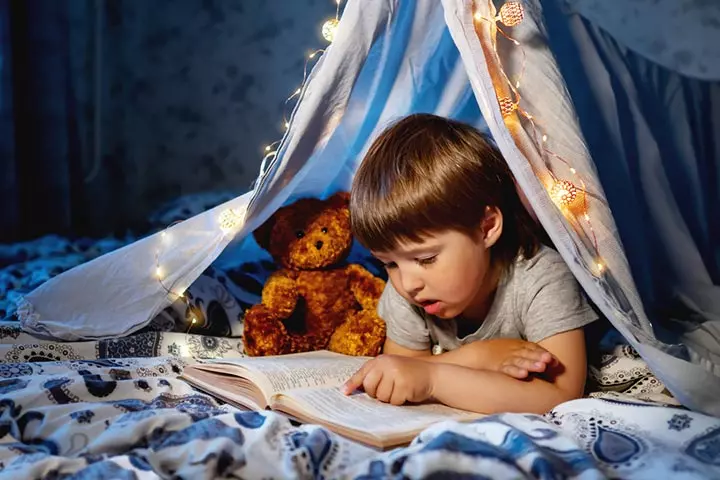
If you do not have chairs or tables available at hand and need a quick fort for your child, a clothesline fort is perfect. This is a simple sheet tent. Your child will enjoy cozy evenings playing and lying down in this fort. The materials are easily available in most homes and can be built in a matter of minutes.
You will need
- Clothesline/long rope
- Screw hooks
- A large sheet/light blanket
- One additional blanket and pillows for the base
How to build:
- Drill holes within two opposite ends of the walls/door frames depending on the length of the sheet and clothesline/rope.
- Twist the screw hooks in those holes and string the clothesline/rope on them.
- Drape a large sheet/light blanket on the clothesline such that the opposite ends are equidistant from the bottom end.
- You can set it up over the bed of your child or on a blanket. Add a few fluffy pillows/ stuffed animals for a cozy feel.
- You can leave both ends open or set it against the wall to cover one side.
8. Cushion fort
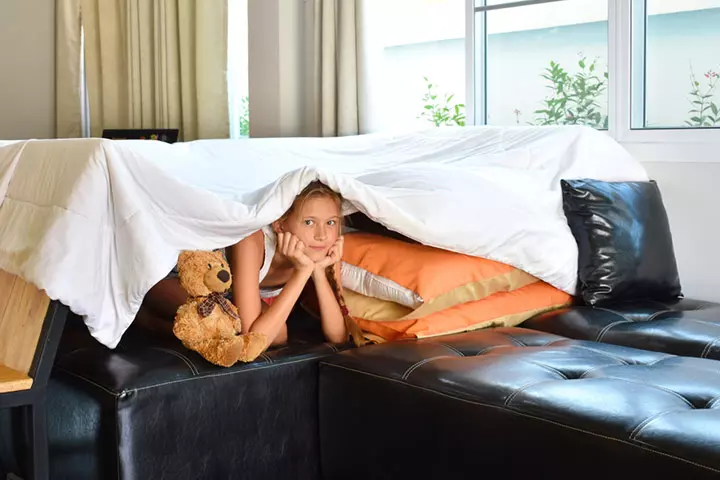
This is a very easy fort to make. Your children can make it themselves and use it as their own private space or play area. You just need a large space enough for a child to sleep in it, a lot of cushions, and a big comforter. You can use a king-size bed as the base or join furniture (sofa/chairs) to create a large area.
How to build
- Arrange four cushions in the form of a large rectangle.
- Stack more cushions on the top of each of the four cushions to form four pillar-like structures.
- Cover these cushions and the joined furniture with a large comforter. The fort is ready.
Here is how blogger Julie Varner Walsh used the fort-building activity to spend quality time with her children. She writes, “ I fear they might even think I’m uninterested in spending time with them. So yesterday, I built a fort. I’m trying to be more aware of our interactions. I’m trying to be more patient and more playful. So, a fort. Yesterday I put their lunches in bowls and I let them eat in their fort. I put the bowls on a tray and I let them help me carry it into the family room while saying, “Wunch is served.” Yesterday I crawled into their fort to get a tour. I sat in there with them and read them stories (i).”
9. Stick fort
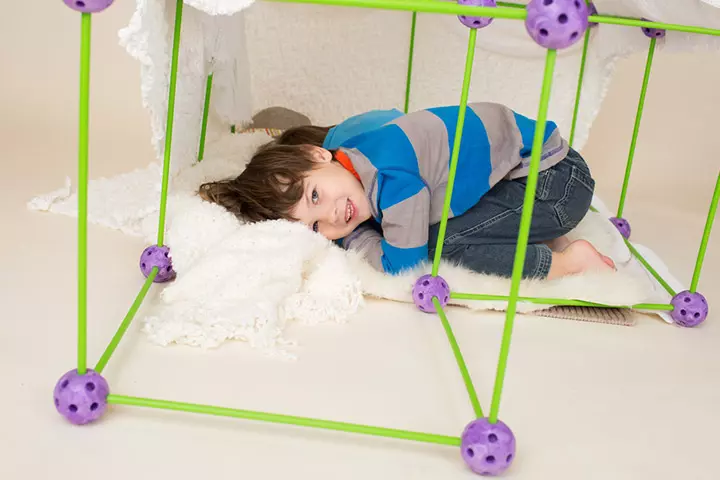
This fort is a fun project for your children. If your kids love building things, crafts, or geometry, they would love this project. The fort is easy to make and occupies very little space. You can dismantle it and connect differently next time.
You will need
- 12” dowel sticks
- Stick connectors
- 3” Styrofoam balls
- Non-stick clay
- Paint and brushes (optional)
- Blanket/comforter
How to build
- If you want the ends of the stick to look colorful, hand paint the balls before starting to build the fort.
- Pierce the Styrofoam balls with the dowel sticks to make holes as required. To make sure the sticks remain firm, cover the ends of the stick with clay before inserting the stick in the ball.
- You can start with a triangle shape and then go on to make bigger structures by connecting two sticks.
- You can cover the structure with a blanket or a comforter to make an enclosed fort.
10. Cute reading nook
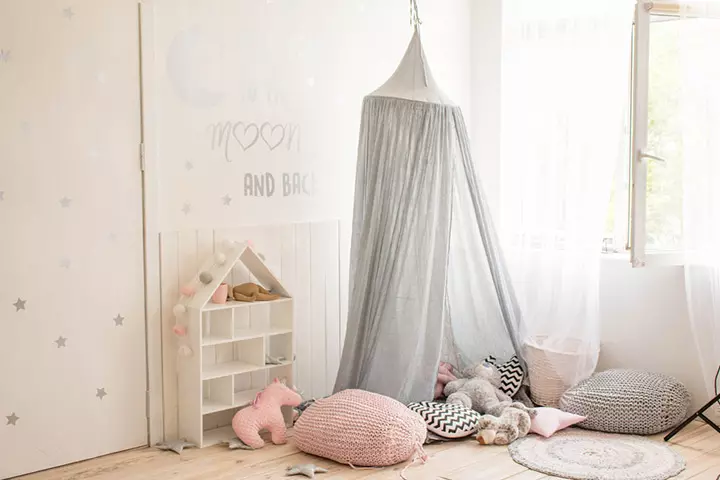
Are you looking for a perfect fort that will motivate your kids to read? This DIY reading fort will do just that. This occupies hardly any space and is also portable. It can also be their cozy space to listen to music while reading.
You will need
- 2 shower curtains
- Large binder ring
- Hula hoop
- Nylon rope
- Felt and Velcro
- Heavy-duty hooks with anchors
- Drill
- Scissors
How to build
- Drill four holes in the hula hoop. Each hole should be equidistant from its adjacent holes and should have one hole directly opposite to it.
- Use a large binder ring and gather the shower curtains in it. Ensure it goes through both the curtains.
- Cut four equal pieces of nylon rope. Each rope will go through each hole in the hula hoop and should loop back up. These ropes will hold the structure to the roof. Hence ensure you have sufficient length of rope.
- Collect all ends of the rope and pull them through the center of the binder ring. Once the ropes are through, tie them together in such a way that the knot is close to the binder ring, leaving the long tail, which will be tied to the roof.
- Install a ceiling hook.
- Use Velcro to join the shower curtains at the top of hula hoops.
- Now seal one end using Velcro while leaving another side partially open. This will be the entrance.
11. Castle made from air

This castle is made using air. It is one of the simplest ones to build and replicate. This can be a perfect hideout for your creative kids on a hot summer day. The materials required to build this fort are easily available at home.
You will need
- Bed
- Large bedsheet (should be much larger than the bed)
- Clamps (for attaching bedsheet to bed)
- Tape (duct tape)
- A table fan or ceiling fan
How to build
- Tuck three sides of the bedsheet into the bed. Ensure that the majority of the blanket is left on the bed, i.e., the tuck is extremely loose.
- Take the center point of the bedsheet’s open side and stick it on the top of the ceiling. You can also tie it on top of a table fan.
- Turn the fan on. The bed sheet will be filled with air.
- Get inside and locate places from where the air is leaking. Seal it using clamps.
- Finally, if required, you can create an entrance by removing a part of the tucked bed sheet and placing weights to keep it in its place.
Some More Fort Ideas To Try
12. Stick fort
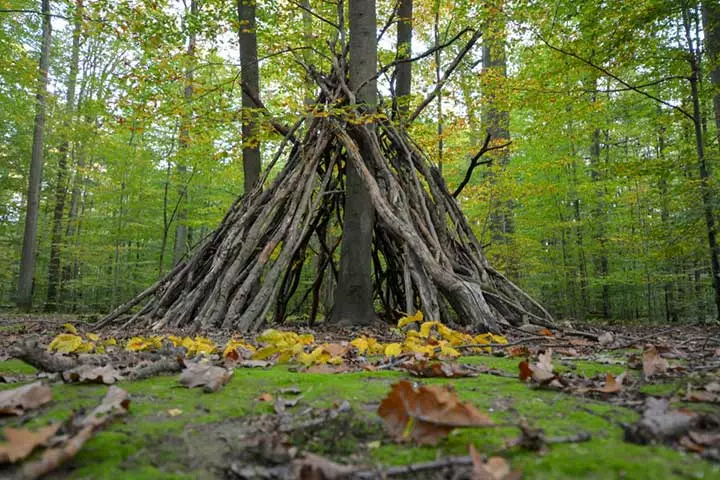
This outdoor fort can help keep the kids away from the sun and rain and could serve as a cool idea when looking for outdoor party games for kids. Shaped with a narrow ceiling and wide base, it creates a fun, cozy space for play. The best part is that the materials needed are readily available outdoors. Building this fort can be a great bonding experience for you and your children.
You will need
- A large tree
- Logs
- Ropes
- Blankets
How to build
- Find a large tree that will act as the central support for your teepee.
- Gather big logs and arrange them in a cone shape around the tree. Each log should lean against the tree to form the walls of the fort.
- Arrange the logs in ascending order of height to form the slanted structure.
- Leave an opening for the entrance.
- Use ropes to secure the logs in place.
- Place blankets or fabric inside the fort to make it feel cozy.
Joyce, a mom, shares her experience of building a fort using logs with her son. She says, “We climbed the logs and put up a tarp. We used logs to weigh the tarp down on one side and some string to attach the other side to a tree. R (her son) was involved throughout the entire process, and I loved listening to him vocalize his plans and narrate what he was doing. We spent almost four hours building and playing in our fort, and we had so much fun. We ate our lunch and read books in the fort. We pretended we were watching exotic wild animals. We looked at slugs and salamanders. And we told ‘spooky’ stories (ii).”
 Did you know?
13. Tarp fort
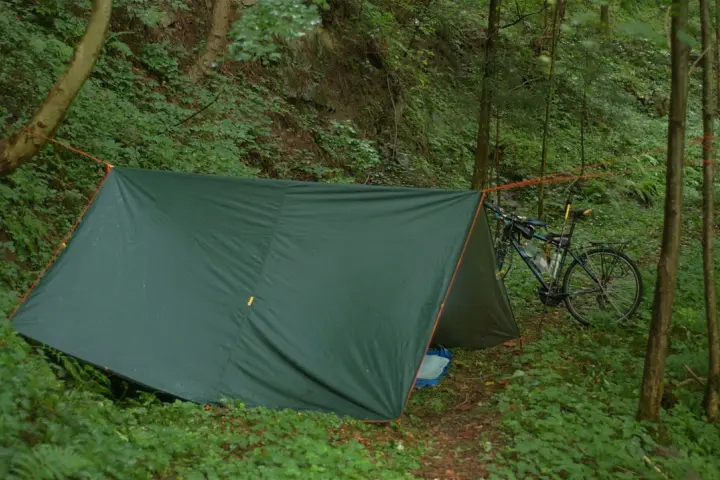
This is not just a fort but a complete play area. It’s ideal for a backyard adventure or even for a family camping trip. While building this would require some tools, time and effort, your children will cherish the memories of playing in this fort for a long time.
You will need
- One large tarp
- Rope
- Stakes or heavy rocks
- Hammer
- Two tall trees or structures
How to build
- Look for two trees that are at least 10-15 feet apart with low branches.
- Secure the tarp across the two tree branches or by tying the rope around each branch.
- Stretch out the corners of the tarp and secure them with stakes or heavy rocks.
- Place blankets or cushions inside the fort.
- Decorate the outside of the fort with fairy lights.
14. Outdoor wooden fort
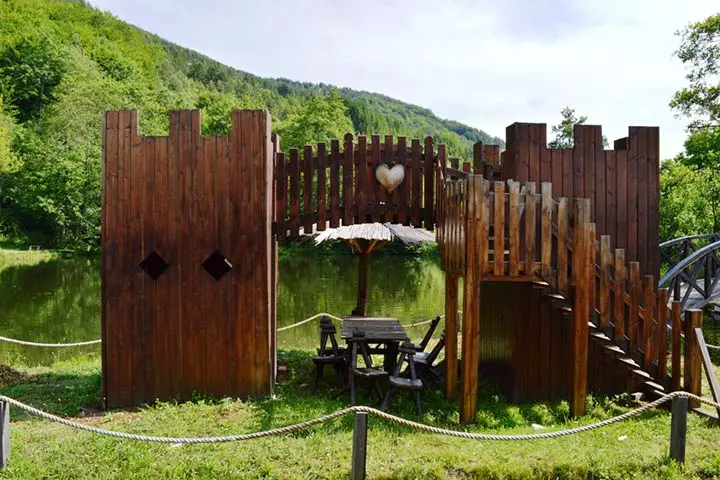
This outdoor wooden framed fort is sturdy and can provide hours of fun time. You can choose the complexity of the castle based on your preference and the space available. Being open from the top, it allows free flow of air and light. Plus, the effort involved in making this fort will be a good learning experience for the child.
You will need
- Wooden fencing sections
- Rope or nails
- Saw
- Hammer and screwdriver
- Measuring tape
- Sandpaper
How to build
- Connect the wooden fencing sections to form a square or rectangular frame.
- Use the measuring tape to ensure your walls are straight.
- Fasten the fencing sections together using rope, nails, or screws.
- Create doors and windows by leaving gaps between fences or cutting out specific parts of the slats.
- Sand any rough edges and cover the nails.
15. Beautiful fort bed
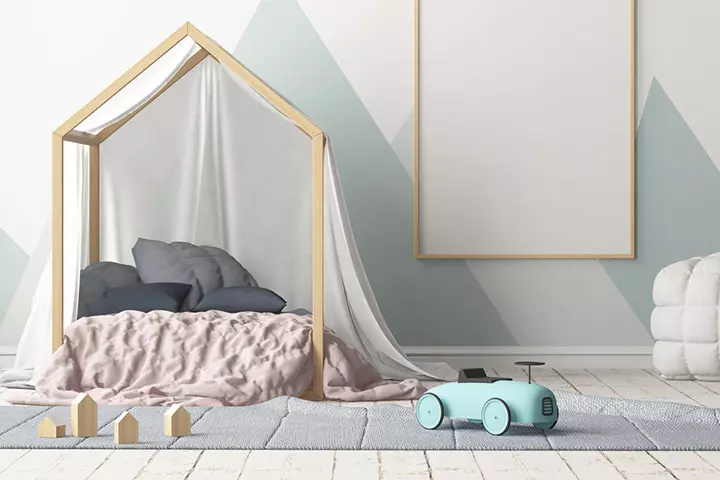
This cute bed fort will add a special charm to your child’s room. The excitement of sleeping in the cute fort will motivate your child to go to sleep early. While this bed fort needs a bit of woodwork to make, it is fairly easy and doesn’t need too much time to build.
You will need
- Wooden frame or slats
- Embroidered cloth
- Hammer
- Nails
- Scissors
- A measuring tape or ruler
How to build
- Measure and cut the wooden slats to create the frame.
- Nail the slats together to form a simple rectangular or square frame.
- Place the frame over your child’s bed or a large cushion.
- Drape the embroidered cloth over the top of the frame and let its sides hang over the sides to create the “walls.”
- Place stuffed animals at the top of the frame.
- Add a flag in one of the corners to enhance the theme of the fort.
16. Building block fort
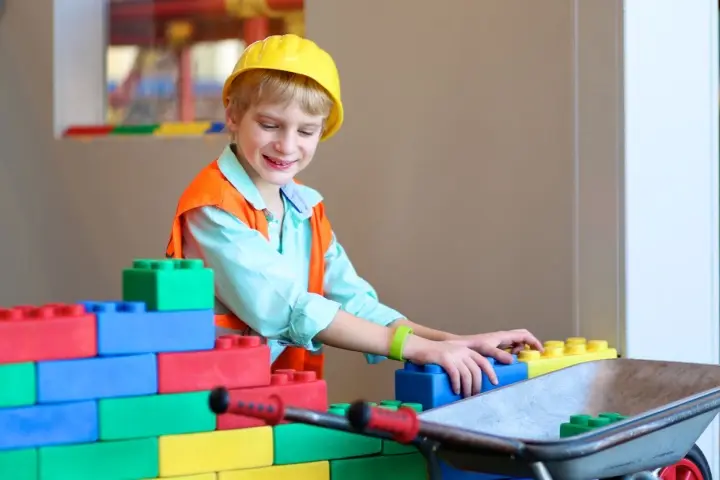
A building block fort combines two of children’s favorite activities—playing with blocks and making forts. When building such a fort, the child will also have to use their problem-solving abilities and creativity to ensure the fort is stable. Here is how you and your child can create a majestic structure that is both fun to build and explore.
You will need
- Large building blocks
- Blankets
- Cushions
- Lights
How to build
- Pick a spacious, flat area.
- Construct a four-foot by four-foot square or a four-foot by six-foot rectangle base with the building blocks.
- Keep stacking the blocks tightly to create the walls of the fort.
- The walls should be about three feet high to accommodate the child.
- Leave an opening on one side of the fort for the entrance.
- Decorate the inside of the building fort with pillows, blankets, and lights.
 Expert says
Precautions To Take When Building Forts For Children
Forts are fun to make and provide children with an independent space to play. However, building them involves tools and materials such as nails, hammers, ropes, and stakes, which can pose hazards if not used properly. Additionally, the forts need to be stable and secure enough to withstand rough handling by children. Here are some expert-approved precautions you can take to enhance safety when building a fort for kids.
- Secure fort furniture to the wall to prevent accidents (1).
- Position chairs used to build forts with the backs facing outward to avoid tipping (2).
- Use corner cushions to cover sharp furniture edges or slats (1).
- Opt for breathable materials to ensure proper airflow.
- Keep cords, ropes, and cables out of reach of children (3).
- Cover nails and fastener points with caps (4).
- Keep decorative items such as pillows away from electrical equipment (2).
- Use battery-powered string lights instead of electrical ones or candles.
- Always supervise children while building the fort and during playtime.
- Keep pets away when building the fort.
Illustration: Best DIY Indoor And Outdoor Fort Ideas For Kids

Image: Stable Diffusion/MomJunction Design Team
Frequently Asked Questions
1. What household items can you make a fort out of?
Bedsheets, pillows, blankets, clothespins, chairs, and curtain rods are some common household items people use to make a fort for their children. People use these items randomly to make a big or small-sized fort. LED lights and buntings are a few accessories you can use to beautify the fort.
2. What do children learn from building a fort?
When children build a fort, they learn the importance of planning and arranging material. With trial and error, they learn the basics of architecture and design. Making different-sized forts using different materials bolsters their creativity, imagination, and critical thinking skills. Above all, building a fort is a physical activity that keeps children on their toes.
3. What are some tips for building a fort with a group of children?
When building a fort with a group of children, here are a few tips to follow for a fun and safe experience. First, allow everyone a chance to share their fort design ideas. Plan and communicate the construction process. Allot each child a task to collect the materials and prioritize safety by using sturdy and non-toxic materials such as paint and don’t leave them unsupervised. And encourage the children to work harmoniously as a team and have fun.
4. What kind of maintenance is needed for forts built by kids?
Indoor forts may not require maintenance because they are usually temporary. However, outdoor forts may require some maintenance to ensure they are safe for children. Regular inspection is necessary to repair and replace damaged parts and check for sharp materials. Additionally, use weatherproof paint and furniture and keep it clean.
Fort ideas for kids help children use their imagination and creativity to build forts with various available materials. Making a castle in the clouds, an A-frame fort, and a playhouse using cardboard or PVC pipes and clothes can be one of the most interesting things to do when kids are bored. A table blanket fort, teepee, stick fort, and cushion fort can be made indoors using various furniture. Outdoor wooden playhouses and stick forts can also be made with the help of adults. Encourage your child to create an outdoor or indoor fort and expand their imagination.
Infographic: DIY Fort Ideas For Children
Playing house and building castles are one of the most loved activities for children. The following infographic presents ideas for building simple forts for your children. You can also join in on the fun and spend time with them inside these forts. Don’t forget to share it with your friends!
Some thing wrong with infographic shortcode. please verify shortcode syntax
Key Pointers
- Building forts is an enjoyable and creative activity for children.
- Forts provide safe spaces for kids to spend time in.
- Indoor forts could be created from bed sheets, quilts, and pillows.
- Outdoor forts can be temporary, using cardboard, or permanent, using wooden frames.
- Use cushions inside forts and ensure they are safe before children play in them.
Encourage imagination and creativity for your children by teaching them how to build a fort in their room. Get creative and have fun with this easy step-by-by-step guide.
Personal Experience: Sources
MomJunction articles include first-hand experiences to provide you with better insights through real-life narratives. Here are the sources of personal accounts referenced in this article.
i. I Built a Fort
https://thesewallsblog.com/2015/02/11/i-built-a-fort/
ii. Fun with fort building;
http://www.childhoodbeckons.com/2011/11/fun-with-fort-building.html
References
- Guidelines for Keeping Your Child Safe at Home
https://www.chla.org/blog/advice-experts/guidelines-keeping-your-child-safe-home - Make a blanket fort
https://www.scouts.org.uk/activities/blanket-fort/ - Health and safety practices
https://www.education.govt.nz/education-professionals/early-learning/running-ece-centre/certification-criteria-for-playgroups/health-and-safety-practices - Toy Safety Business Guidance
https://www.cpsc.gov/Business–Manufacturing/Business-Education/Toy-Safety
Community Experiences
Join the conversation and become a part of our nurturing community! Share your stories, experiences, and insights to connect with fellow parents.
Read full bio of Katherine Paxton

Kristen Miller began her career in Early Childhood Education in 1997 as a teacher's aide in the classroom while she pursued her degree in Political Science from University of Maryland, Baltimore County. She quickly discovered her talents in educating and nurturing young children and continued in the classroom as a lead teacher. Currently, Kristen is director of education at Celebree School, a nationwide early childhood education franchise, where she coaches teachers in instilling a lifelong passion for learning in their students. She is a long-standing member of Maryland State Child Care Administration.
Kristen Miller began her career in Early Childhood Education in 1997 as a teacher's aide in the classroom while she pursued her degree in Political Science from University of Maryland, Baltimore County. She quickly discovered her talents in educating and nurturing young children and continued in the classroom as a lead teacher. Currently, Kristen is director of education at Celebree School, a nationwide early childhood education franchise, where she coaches teachers in instilling a lifelong passion for learning in their students. She is a long-standing member of Maryland State Child Care Administration.
Read full bio of Nisha Bharatan
Read full bio of Harshita Makvana
Read full bio of Trisha Chakraborty


