Image: ShutterStock
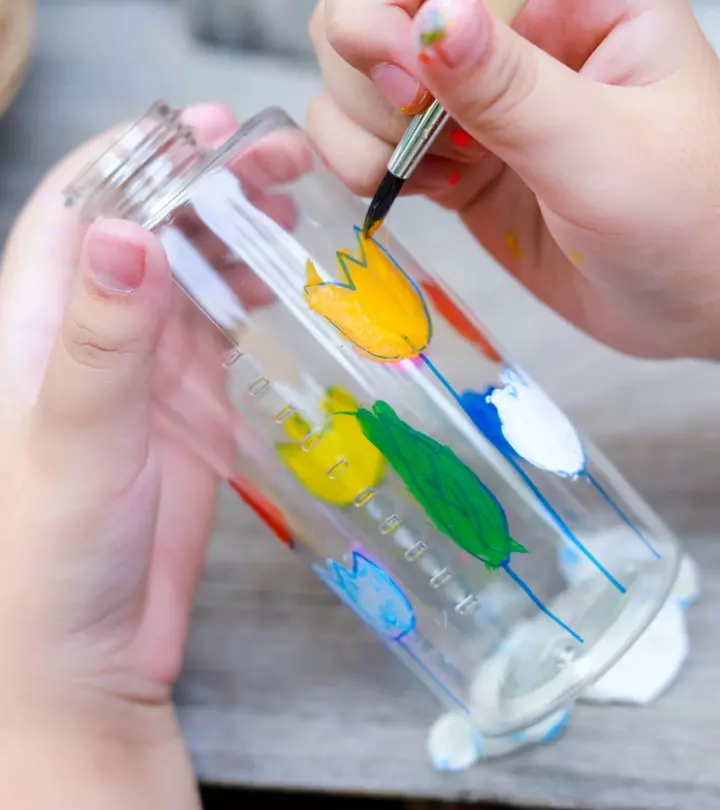
Plastic bottles are ubiquitous, making their disposal a challenging task. However, you can turn this menace to your advantage by trying plastic bottle crafts for kids. If you have plenty of water bottles at home, you can turn them into beautiful crafts involving your kids.
The exercise will be enjoyable to your children and help you identify their artistic talents. Here, we have made a list of some plastic bottle crafts for kids to help you create something beautiful at home and teach your children the benefits of upcycling.
Key Pointers
- Recycle the house plastic bottles with fun crafts such as “Soda Bottle Pencil Case” or “Plastic Chandelier.”
- Repurpose them into “Vertical Garden” or “Birdfeeder.”
- Summertime can be a lot more enjoyable when old plastic is transformed into sprinklers.
21+ Creative Plastic Bottle Crafts For Kids
Plastic bottles are known for their flexibility and durability. Create beautiful DIY artworks or crafts using them to decorate your home. Clean the bottle, remove the label by soaking it in warm water for a while, and get going with your children for some amazing family bonding and crafting time.
1. Glow bottle
Make these glow-in-the-dark bottles to put in your child’s bedroom at night. They can be used as a calming device when your children are on time-out.
You will need:
- Plastic bottle
- Hair gel
- Glitter glue
- Glow-in-the-dark paint
- Superglue
- Glow stars
How to make:
- Put some glitter glue in the bottle.
- Add some glow-in-the-dark paint into the bottle.
- Mix the hair gel with some water and pour the mixture into the bottle.
- Put in the glow stars.
Use super glue to stick the bottle’s cap to the bottle so that the mixture doesn’t spill out.
2. Soda bottle pencil case
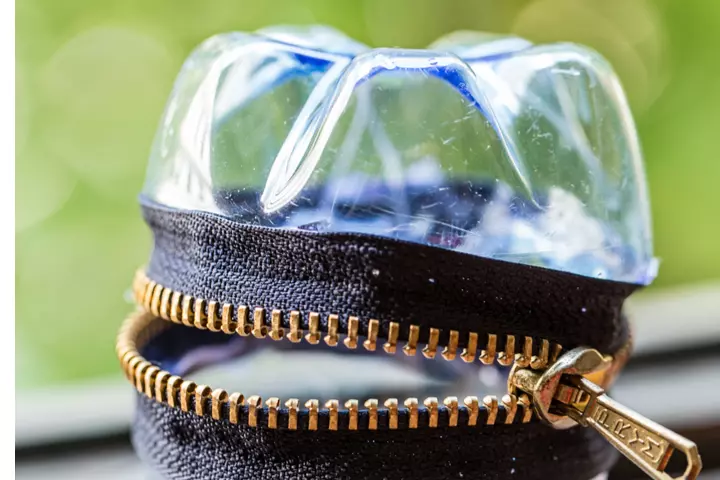
This pencil case is the best way to make a statement at school. It is a functional piece of craft that is quite easy to make.
You will need:
- Two soda bottles of the same size
- Zipper
- Hot glue
- Felt
- Scissors
- Sandpaper
How to make:
- Cut one soda bottle four inches from the bottom and the other at two and quarter inches from the bottom.
- Sand the cut edges to make sure they are smooth.
- Measure the zipper along the circumference of the bottles and cut off the excess.
- Cut a small rectangle of felt and glue it to the end of the zipper. This prevents the zipper from opening completely.
- Use hot glue to stick the zipper to the bottle. Make sure you leave enough space for the zipper to run freely.
- Keep the felt end of the zipper unglued.
- Apply hot glue on the other side (the inner upper side) of the zipper and glue it to the other bottle.
- Make sure the felt piece fits perfectly. Cut it if necessary, and hot glue it to both bottles.
3. Plastic apple
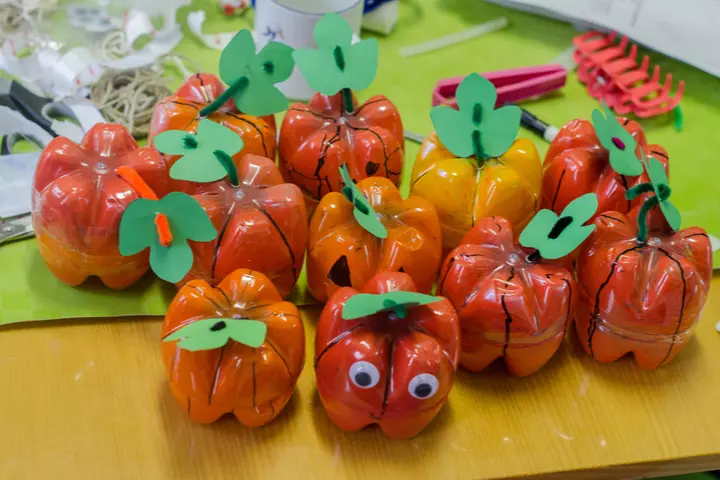
An apple a day keeps the doctor away. This apple keeps the plastic away from polluting your environment.
You will need:
- Two empty 1.25l plastic bottles
- Red or green cellophane or tissue paper (you can also use thin cloth materials)
- Green and brown felt
- Ribbon or string
- Needle and thread
- Sandpaper
- Scissors
- Glue
How to make:
- Cut around three inches from the bottom of each bottle.
- Sand the edges to make sure there are no rough edges.
- Heat the scissors and make a hole through the center of one of the bottom pieces.
- Thread the ribbon or string through the hole and knot it on the inside.
- Cut a stem and a couple of leaves from the felt.
- Stitch them together.
- Glue them to the ribbon or thread.
- Scrunch up the cellophane, tissue paper, or fabric and place it inside the other cup.
- Place one cup on top of the other and press down until they fit snugly.
- You can use glue or tape to make sure the two cups won’t come apart.
4. Vertical garden
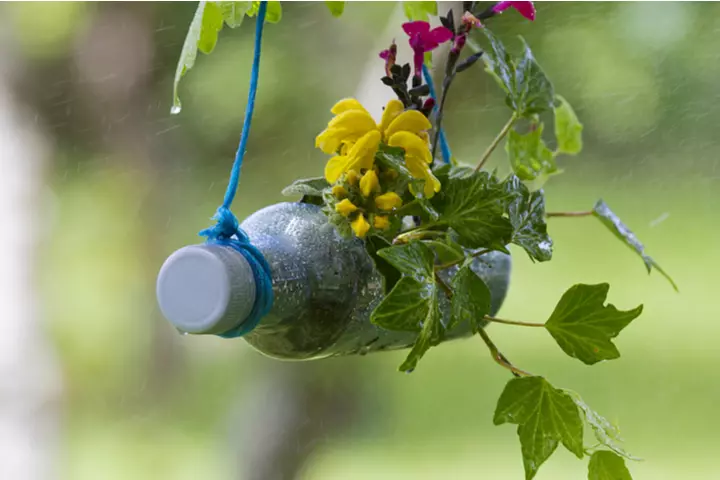
If you want to teach your children the concept of “best out of waste,” there is nothing better than this idea. Make a garden for new plants using plastic bottles.
You will need:
- Plastic bottles
- Scissors
- Drill
- Nails
- Soil
- Seeds
- Rope
- Sandpaper
How to make:
- Drill holes in the wall where you want to set up the vertical garden and insert the nails into the holes. The distance between the holes will depend on the size of the bottle you are using.
- Cut a rectangle from the midsection of a bottle.
- Sand it to smoothen the edges.
- Drill four holes in the bottle–two on opposite sides around an inch below the cap and two on opposite sides an inch above the bottom. You can use a pair of heated scissors to make the holes as well.
- Also, make some holes on the opposite side of the rectangular opening.
- Fold the rope and thread one end through the two holes at the top and the other end through the two holes at the bottom.
- Tie the loose ends of the rope to the nails and secure them. Your bottle will be horizontal at this point, with the rectangular opening facing upwards.
- Fill the bottle with soil and push in the seeds.
 Quick tip
5. Apple container
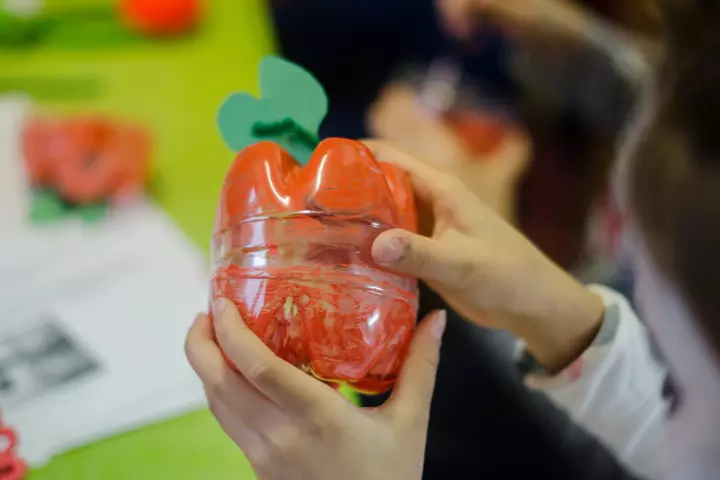
These mini containers made from empty plastic bottles will ensure you are never out of containers again. They are great for gifting, and you can make them in any size you want.
You will need:
- Two plastic bottles of the same size
- Zipper
- Spray paints in red and green colors
- Hot glue
- Painter’s tape
- Scissors
- Sandpaper
- Green cardstockiPaper that is thicker than ordinary paper and is used to make invitations or business cards
- Cardboard
How to make:
- Cut the two bottles around three inches from the bottom.
- Sand the edges to make sure there are no rough edges.
- Apply painter’s tape on the outside and spray paint on the inside of both pieces. Spray lightly and apply two or three coats of paint. Make sure the paint doesn’t pool at the bottom.
- Remove the painter’s tape.
- Measure the zipper along the circumference of the bottles and cut off the excess.
- Apply hot glue to the end to seal the zipper. This prevents the zipper from running off the track.
- Apply hot glue to the inner side of the zipper to attach one bottle piece to it, unzip it fully, and then attach the other. Make sure you leave space for the zipper to operate without snagging.
- Cut a rectangular stem from cardboard and a leaf shape from the cardstock.
- Hot glue them to the apple.
 Point to consider
6. Bottle sprinkler
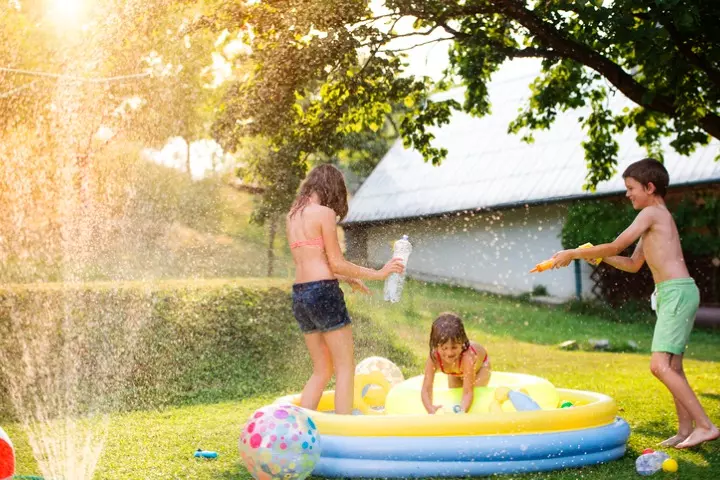
If you want a sprinkler for your outdoor plants, you can make one yourself with a plastic bottle. Use this for days when you have to go out of town yet want to keep your plants happy.
You will need:
- 2l plastic bottle
- Garden hose spigotiA tap on the external of the house to which the garden hose pipe is connected
- Garden hose
- Duct tape (optional)
- Scissors or pointed screwdriver or awliA sharp tool used to make holes
How to make:
- Attach the plastic bottle to one end and the garden hose to the other end of the spigot.
- Make a few holes in the bottle.
- Connect the other end of the garden hose to a water supply.
- If there is any leakage in the joints, secure them with duct tape.
7. Plastic bottle butterflies
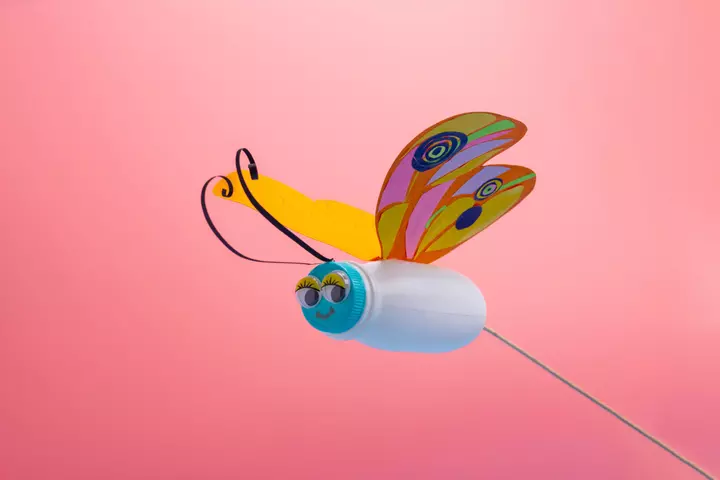
This charming butterfly craft is a simple and creative way to repurpose a plastic bottle. With colorful paper wings and antennae, it is a fun activity that helps kids explore art and learn more about reuse, recycling, and sustainability.
You will need:
- A small plastic bottle
- Colored paper or cardstock
- Scissors
- Markers or crayons
- Glue or tape
How to make:
- Cut out two large butterfly wings from colored paper. Decorate them with patterns using markers or crayons.
- Attach the wings to the back of the plastic bottle using glue or tape. Ensure they are evenly positioned to resemble a butterfly.
- Cut two thin strips of paper to create the antennae. Curl the ends slightly for a delicate look.
- Glue the antennae to the top of the bottle’s cap.
- Add any extra decorations, such as small paper dots or designs on the bottle, to enhance the butterfly’s look.
8. Plastic bottle bird feeders
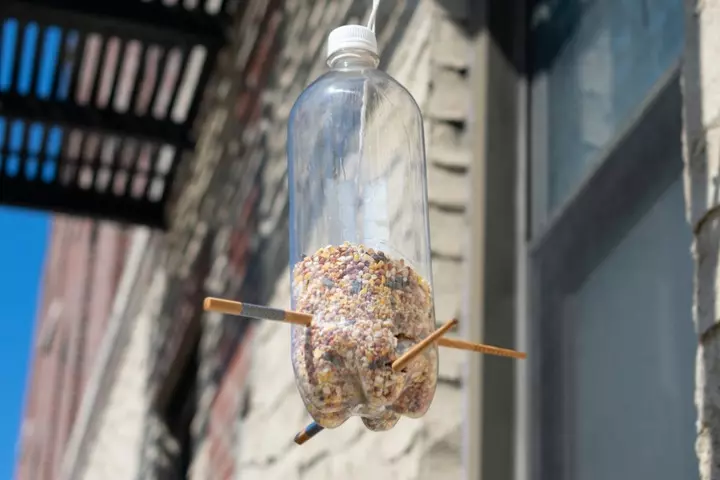
These bird feeders for kids are extremely functional and will give your children an opportunity to observe birds closely.
You will need:
- 5l soda bottle
- Craft knife
- Small eye screw
- Two chopsticks
- TwineiA thick string made of cotton, plastic, or hemp to securely tie heavy objects
How to make:
- Poke a hole through the lid of the bottle and insert the small eye screw through it.
- Thread twine through the eye of the screw.
- Make two sets of holes in the bottle–one set around the midway, and the other set near the bottom. Each set of holes should be directly opposite each other.
- Insert the chopsticks through these holes.
- Fill the bottle with birdseed.
- Cut a hole, enough for the birds to gain access to the feed.
- Close the cap.
- Tie the other end of the twine to a branch.
9. Colorful Spiral Plastic Bottle Garland
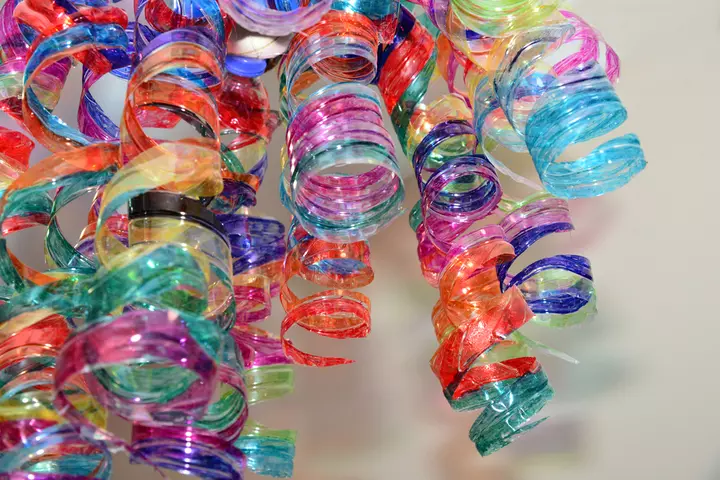
Give new life to plastic bottles by transforming them into a stunning spiral garland! This fun and eco-friendly craft creates a vibrant, swirling decoration that is perfect for festivals, parties, or outdoor spaces.
You will need:
- Plastic bottles in various bright colors
- Scissors or craft knife
- String or thin wire
- Hole punch
How to make:
- Remove any labels from the plastic bottles and clean them thoroughly.
- Using scissors or a craft knife, cut the bottle into a continuous spiral strip from top to bottom. The width of the strips can vary to create different effects.
- Punch a hole at the top of each spiral.
- Thread a string or wire through the holes, spacing the spirals evenly along the length.
- Hang the garland in a bright area where the spirals can twirl and reflect light beautifully.
10. Plastic jellyfish
If your child is interested in sea creatures, make a jellyfish for them to put in a plastic bottle. They can observe their jellyfish and even consider it their pet.
You will need:
- Transparent plastic bag
- Plastic bottle
- String
- Blue food color
- Scissors
How to make:
- Cut a small square off the plastic bag.
- Bring the ends together and make a small balloon. Tie it loosely with the string.
- Cut the edges of the sheet so that they look like tentacles.
- Fill the ballooned part of the sheet with water.
- Put it inside the bottle. It will settle at the bottom.
- Fill the bottle with water and add a few drops of blue food color to the water.
- Screw the cap on.
- Shake the bottle to make the jellyfish float.
11. Bottlecap mosaic
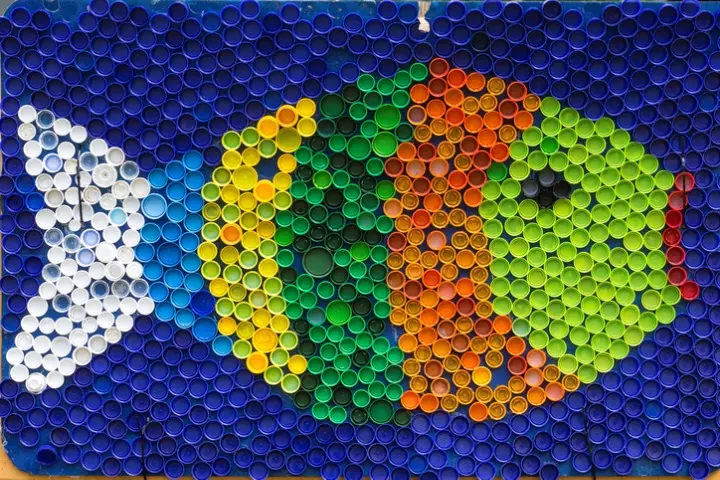
Brighten up a wall or any surface by making a beautiful mosaic using bottle caps. If you don’t have enough bottle caps, ask your friends and neighbors to save theirs.
You will need:
- Plastic bottle caps in different colors and sizes
- Glue
- Pencil
How to make:
- Select the surface on which you wish to make the mosaic. You may make it on a canvas board, a garden wall, or a fence.
- Draw a design on the surface with a pencil.
- Decide the color scheme of the design.
- Apply glue to the top of each cap and attach them to the surface according to your design.
12. Plastic spoon lamp
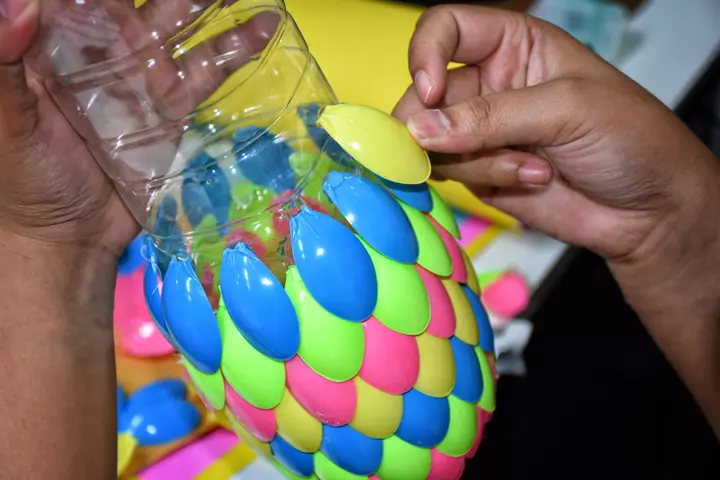
This easy-to-make plastic lamp is made of plastic spoons and looks pretty when lit. You can put it up in your living room or dining room for a muted light effect.
You will need:
- 5l plastic bottle
- Plastic spoons
- Exacto knifei A scalpel-type knife used for precision cutting of materials in arts and crafts
- Bulb
- Holder
- Wire
- Scissors
How to make:
- Cut one inch off the bottom of the bottle. Remove the lid.
- Cut each spoon just below the flat portion.
- Apply hot glue to the inner (concave) side of the spoon and stick it to the bottle from the bottom.
- Once a layer is done, partially overlap the next layer on top of the first one.
- Continue this process until the whole bottle is covered.
- Attach the holder to one side of the wire and pass the other end through the mouth of the bottle.
- Screw in the bulb and put the light up wherever you want.
13. Plastic bottle piggy bank
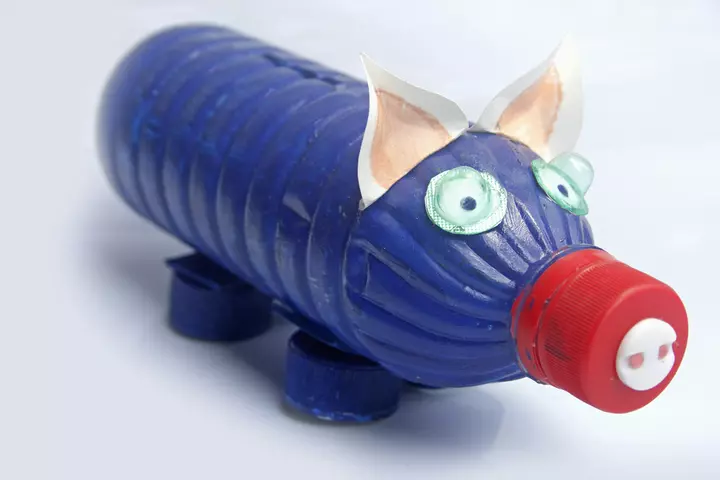
This piggy bank made of plastic bottles is not only cute but also helps inculcate the habit of saving money in children. You can make a few of them for various purposes such as saving, spending, and donating.
You will need:
- Plastic bottle
- Googly eyes
- Bottle caps
- Hot glue and gun
- Thick paper
- Scissors
How to make:
- Cut a rectangular hole of around 2x ½ inches. The long side of the rectangle should be along the length of the bottle.
- Take the paper and cut out ear shapes and a circular shape for the snout.
- Stick them to the bottle. The circular shape should come over the cap of the bottle.
- Glue on the googly eyes.
- Glue four bottle caps on the lower side of the bottle, below the slit. These will make the legs of the piggy.
14. Plastic bottle jewelry stand
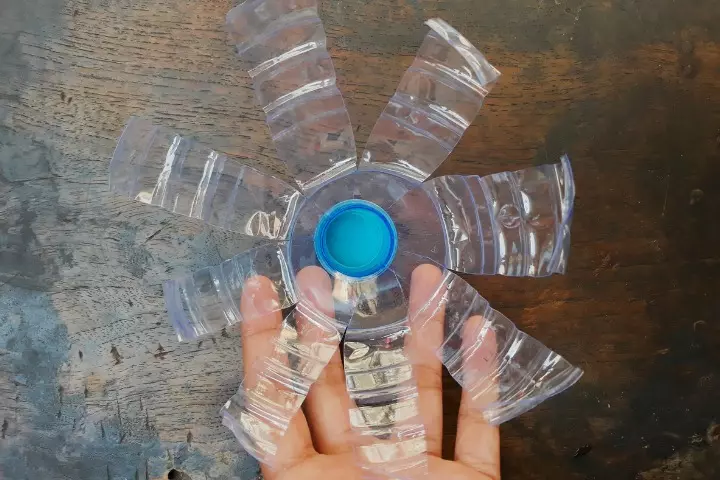
This pretty jewelry stand can hold all your fashion accessories. Besides, it is easy to make.
You will need:
- Four plastic bottles – two 2l bottles, one 1l bottle, and one 20 oz bottle
- Exacto knife
- Scissors
- 12-inch threaded rod
- Nuts and washers
- Drill
How to make:
- Using the knife and scissors, cut the bottles from the bottom so that they look like flowers.
- Drill holes through the center of each ‘flower.’
- Put them through the rod and sandwich each of them on both sides with nuts and washers. The lowest ‘flower’ will be facing downwards to make the base of the stand. The others will be facing upwards.
- Secure all the nuts firmly.
15. Bottle monsters
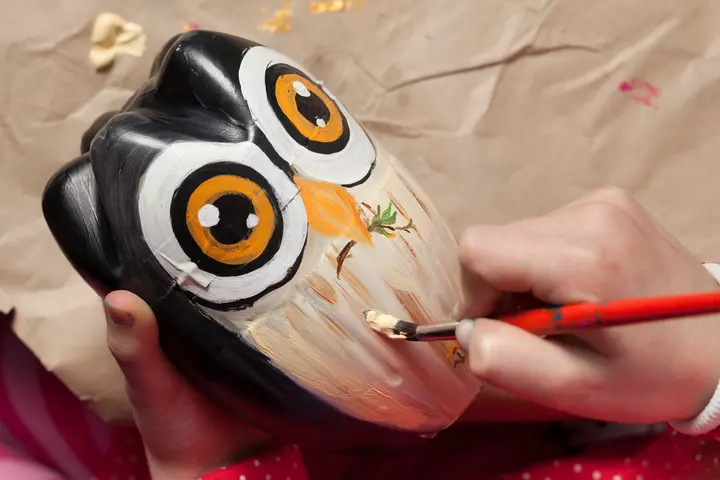
You can make these monsters out of empty plastic bottles for Halloween.
You will need:
- Plastic bottle
- Marker
- Exacto knife
- Acrylic paints
- Paintbrushes
How to make:
- Take a clean, dry, and empty plastic bottle and draw your monster’s face on it with a marker.
- Cut off the top of the bottle and the opening of the mouth using the knife.
- Paint the monster in the colors of your choice.
- Apply two or three coats if necessary.
- Let the paint dry completely.
- Put in candies and place the monster outside your front door for trick-or-treating.
16. Plastic bottle flower pots
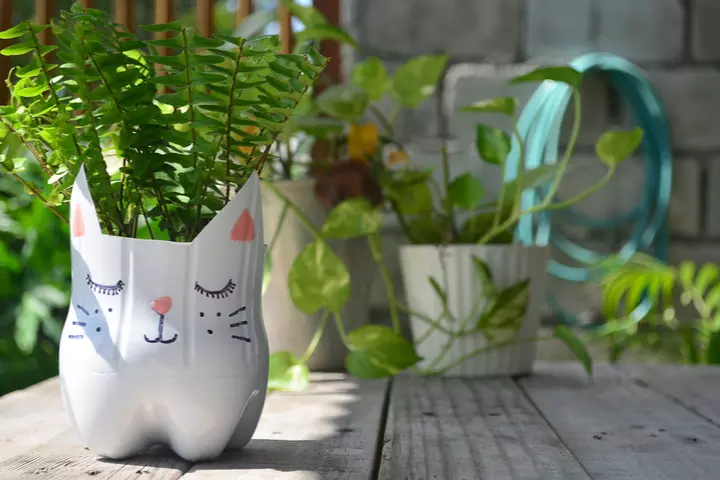
Encourage your children to care for their plants by making these plastic flower pots with them. You can decorate them whichever way your children want for some extra incentive.
You will need:
- Plastic bottles
- Exacto knife
- Acrylic paints
- Paintbrushes
- Scissors
- Soil
- Seeds
How to make:
- Cut an empty plastic bottle in half.
- Color the lower half in the colors of your choice.
- Let the paint dry completely.
- Heat the scissors and make holes at the bottom of the bottle. These holes help the excess water drain off.
- Fill the bottle with soil and plant a few seeds.
 Quick tip
17. Bottle Cap Animal Crafts
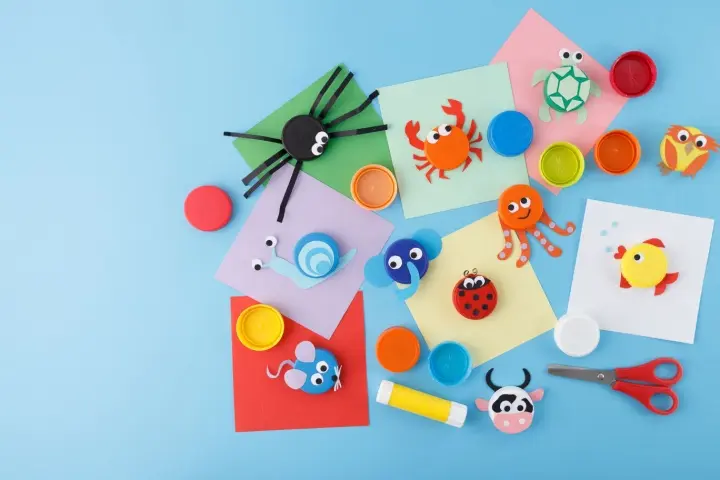
Turn plastic bottle caps into adorable animal crafts! These tiny animal faces can be used as fridge magnets, decorations, or playful learning tools.
You will need:
- Plastic bottle caps (various colors)
- Googly eyes
- Colored paper or foam sheets
- Markers or paint
- Glue
- Scissors
How to make:
- Clean and dry the bottle caps.
- Use markers or paint to draw noses, mouths, and other facial details.
- Cut out ears, tails, and other features from colored paper or foam.
- Glue the ears and details onto the bottle caps.
- Attach googly eyes to complete the animal look.
- Let them dry, then use them as magnets, decorations, or toys.
18. Turtle Craft
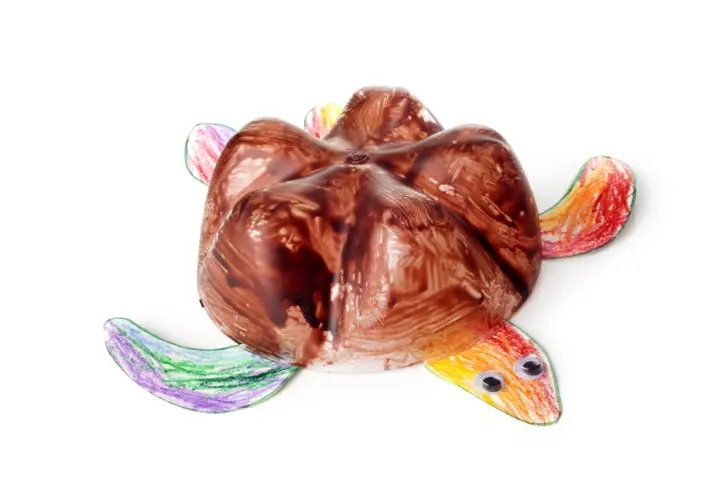
Create a cute and eco-friendly turtle using plastic bottles! Perfect for school projects, garden décor, or just a fun afternoon activity.
You will need:
- A plastic bottle
- Green construction paper or foam sheet
- Googly eyes
- Scissors
- Glue
How to make:
- Cut the bottom of a plastic bottle to form the turtle’s shell.
- Cut out the head, legs, and tail from green construction paper or foam.
- Glue the head, legs, and tail to the underside of the bottle shell.
- Attach googly eyes to the turtle’s head.
- Let it dry and your adorable turtle is ready!
19. Flower paint stamp
This is a great craft for young children. In this craft, you do not have to actually make something out of a plastic bottle. Instead, you can use the plastic bottle for a different purpose.
You will need:
- Plastic bottles in different sizes
- Paints
- Paper plate
- A4 sized paper
- Pencil
How to make:
- Draw and paint the stem of a flower or the trunk of a tree on a sheet of paper.
- Pour the color of your choice on the paper plate.
- Dip the lower portion of the bottle in the paint and stamp it on the sheet of paper to resemble flowers.
- Use bottles of different sizes to make a garden of different colored flowers.
- Use newspapers to place the bottles when not in use.
20. Plastic playhouse
Use old milk bottles to make some playhouses for your children’s dolls. They are extremely easy to make, and your children will spend hours playing with them.
You will need:
- Empty milk bottle
- Exacto knife
- Hot glue
- Construction paperiColored, rough, and thick paper
- Scissors
How to make:
- Clean and dry the milk bottle thoroughly.
- Cut a big opening on one broadside just below the handle so that it resembles a door.
- Cut out rectangular shapes from the other sides for the windows.
- Make shapes on the construction paper and hot glue them to the bottle for the windows.
- Decorate the house in the way you want.
- You can add some bits of furniture from the scrap bits of plastic.
21. Bottle firefly
Children love glowing things, fireflies being among them. So, engage your child in making a unique bottle firefly whenever they wish.
You will need:
- 20 oz green plastic bottle
- Glow stick
- Three pipe cleaners in green
- One pipe cleaner in black
- Pony beads
- Cardstock
- Glue
- Scissors
- Black acrylic paint
- Clear tape
How to make:
- Twist three green pipe cleaners around the middle of the bottle. Twist their ends together so that they resemble the legs. The bottle should be supported by these “legs” when placed on its side.
- Cut the cardstock and wrap it around the bottle. Leave the legs free. Do not cover the top and the bottom of the bottle.
- Glue the cardstock to the bottle.
- Cut two wing-shaped pieces from another cardstock and stick them to the first cardstock on the bottle.
- Put a glow stick inside the bottle. You can use tape to secure it near the top of the bottle.
- Screw the cap on and stick the pony beads for the eyes.
- Bend the black pipe cleaner in a V shape and then gently roll its ends to resemble antennae.
- Stick it above the eyes.
- Let the glue dry completely.
22. Water bottle penguin craft
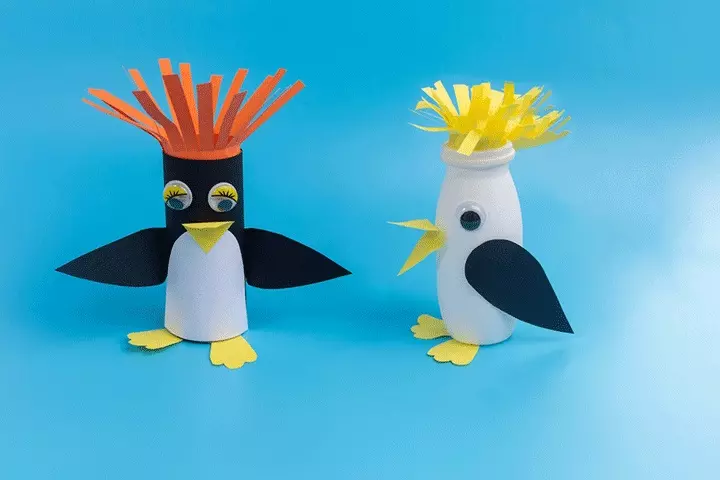
Help your kids transform a plastic water bottle into an adorable penguin with paint and creative details.
You will need:
- Empty plastic water bottle
- Black and white craft paint
- Paintbrushes
- Craft foam or construction paper in black, white, orange, and yellow
- Googly eyes
- Glue
- Scissors
- Marker
How to make:
- Paint a plastic water bottle black with a white belly.
- Cut a white oval for the face and glue on googly eyes.
- Create an orange beak and two webbed feet.
- Attach the face above the belly and add the beak and feet.
- Cut black wings and white markings for the belly.
- Glue on the wings and markings, then draw additional details with a marker.
- You may even use craft papers on the bottle and make cute penguins.
Tips For Making Plastic Bottle Crafts Fun And Educational
- Pick age-appropriate crafts: Choose projects that match a child’s skill level. Younger kids can make simple planters, while older ones can try hanging bottle lanterns.
- Prioritize safety: Help with cutting and sanding sharp edges. Use child-friendly scissors, glue, and non-toxic paints for a safe crafting experience. You must also be mindful of your choice of paint as it impacts the outcome and the appeal of the craft for the child. According to Louise, a mother of three, who made plastic bottle Halloween lanterns with her kid, ”We painted our orange pumpkin lantern with poster paint and found lots of the paint flaked off so I would definitely advise using acrylic paint (i).”
- Encourage creativity: Let kids personalize their crafts with paint, stickers, or ribbons. Giving them creative freedom makes crafting more fun and builds confidence.
- Make it useful: Create practical crafts like bird feeders, storage containers, or planters. Seeing their work serve a real purpose makes it more meaningful.
- Incorporate storytelling: Encourage kids to create stories around their crafts. A bottle rocket, for example, can become part of an exciting space adventure.
- Add a fun challenge: Organize a contest where kids design the most creative or useful craft. Friendly competition keeps them engaged and thinking outside the box.
- Talk about sustainability: Discuss how upcycling plastic reduces waste and helps the environment. Instilling eco-friendly habits early is essential.
- Display their work: Display crafts at home, in class, or online. Recognizing their efforts boosts confidence and inspires more creativity.
Frequently Asked Questions
1. How can I make plastic bottle crafts safe and age-appropriate for children?
To make plastic bottle crafts safe for children, use age-appropriate techniques that are easy for younger children; you can increase the difficulty level and materials used for the crafts as they grow older. Also, use child-safe stationeries and other materials. Always monitor them and ensure that all sharp-edged materials, such as scissors, knives, and bottle cuts, are being used carefully.
2. Can I teach my children about recycling and sustainability through plastic bottle crafts?
Engaging your children in plastic bottle crafts is a great way to introduce them to the concept of reduce, reuse, recycle for kids. Tell them the importance of recycling and how it helps in environmental protection. You can show them a creative way to recycle by using materials such as old newspapers or magazines, straws, toys, used plastic bottles, old jars or utensils, and other recyclables around the home. These waste material crafts for kids can make recycling both fun and educational.
3. Can I use different types of plastic bottles for crafts, or are there specific types that work best?
You can use any type of plastic bottle depending on the type of craft and the size of bottle you want for the craft. But it’s important to note that not all plastics are easy to use in crafts.
4. Are there any plastic bottle crafts for children that can be done indoors or outdoors?
Plastic bottle crafts can be made indoors or outdoors, depending on the type and size of the project. Bird feeders and planters are some plastic bottle crafts that can be made outdoors, while indoor activities may include making holders or home decor.
5. What are some tips for storing and organizing plastic bottle crafts for children?
To store and organize plastic bottle crafts, you can create a space in your living room or in your child’s bedroom to display their work; this will also help encourage your child’s creativity.
6. How can I encourage my child’s creativity and imagination through plastic bottle crafts?
You can use plastic bottle crafts to foster creativity and imagination in your children by instructing them to make something unique from the given supplies. You can also give them a topic or theme and let them use their imagination to create a plastic bottle craft that will suit the theme.
Plastic items do not get degraded easily and contribute to environmental pollution. There is an urgent need to reduce and recycle plastic waste to help our planet recover. These plastic bottle crafts for kids can encourage your children to learn more about recycling plastic in fun and useful ways. Instead of discarding plastic bottles, children could acquire an interest in making new items such as a planter, bird feeder, or pencil case. This allows a child’s creativity to blossom while also teaching them to be ecologically mindful. The craft ideas on this list also make great Earth Day activities for kids.
Infographic: Games And Activities Your Children Will Love
Educational games are one of the best teaching methods for children of all ages as they incorporate the fun of playing games with learning. They even make the subject interesting and practical for them to understand. So, let’s check out the infographic below for some educational games and activities you may try.
Some thing wrong with infographic shortcode. please verify shortcode syntax
Illustration: Creative & Easy Plastic Bottle Craft Ideas For Kids

Image: Stable Diffusion/MomJunction Design Team
Watch ordinary bottles transform into extraordinary works of art with this engaging video and educate your child on the benefits of reusing and recylcing.
Personal Experience: Source
MomJunction articles include first-hand experiences to provide you with better insights through real-life narratives. Here are the sources of personal accounts referenced in this article.
i. Plastic bottle Halloween lanternshttps://www.messylittlemonster.com/2014/10/plastic-bottle-halloween-lanterns.html?m=1
Community Experiences
Join the conversation and become a part of our nurturing community! Share your stories, experiences, and insights to connect with fellow parents.
Read full bio of Elisa Yi
Read full bio of Nisha Bharatan
Read full bio of Harshita Makvana
Read full bio of Vaswati Chatterjee


